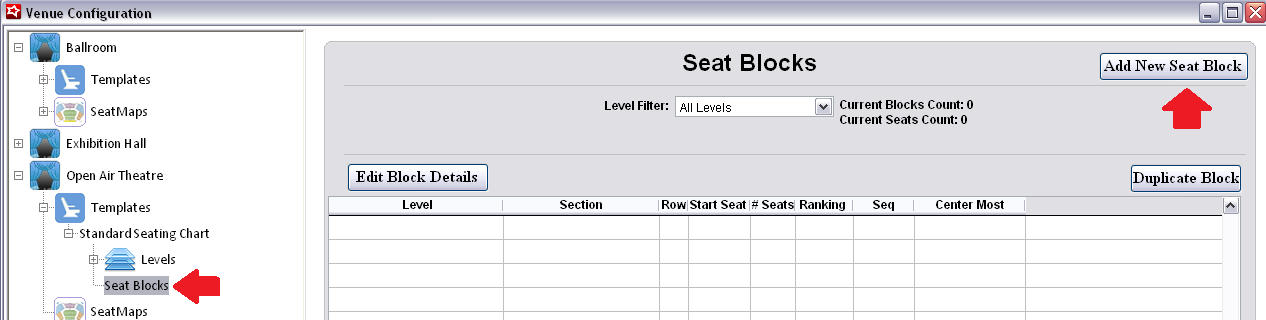
Seat Blocks
Once all Levels and Sections have been defined, it is time to create the Seat Blocks. Having a seating chart of your venue make this process much easier.
1. Start by selecting the Seat Blocks option for the Venue template and click Add New Seat Block.
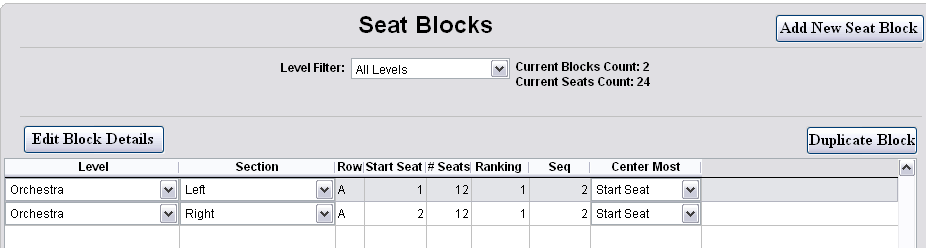
Define the Seat Block:
1. Select the Level and Section from the pre-defined list for the template.
2. The Row can either be a letter or number.
3. The Start Seat is the seat number of the first seat in the Seat Block.
4. The # of Seats is the number of seats located in that row or block.
5. The Ranking is a subjective number and is used to identify the quality of the seat block compared to others.
• Lower numbers = better seats, so the best seats in the house are ranked with 1. The same ranking number can be repeated throughout multiple seat blocks, but all seat blocks with the same ranking are considered equal during the Best Available seat search.
6. Enter the sequence (Seq).
Example:
The sequence determines how the seats count-up throughout the seat block. A start seat of 1 with nine total seats and a sequence of 1 results in a seat block with seats 1, 2, 3, 4, 5, 6, 7, 8 and 9. A start seat of 1 with nine total seats and a sequence of 2 results in a seat block with seats 1, 3, 5, 7, 9, 11, 13, 15 and 17.
7. Finally, select the Center Most designation for the seat block. In other words, is the stage located nearest to the Start Seat, Center Seat or End Seat of the seat block. The Center Most designation is used to help define the best seats within the block during the Best Available seat search.
Once a Seat Block has been defined, it can be duplicated to speed the data entry required for Venue templates. A system check at Save ensures that the same seats have not been defined more than once within the entire Seat Block activity for the template.