Report Builder 2.0 use
Note: For detailed instructions on using Microsoft Report Builder 2.0 please see the Microsoft web site:
http://msdn.microsoft.com/en-us/library/dd220460.aspx
1. Open Report Builder 2.0
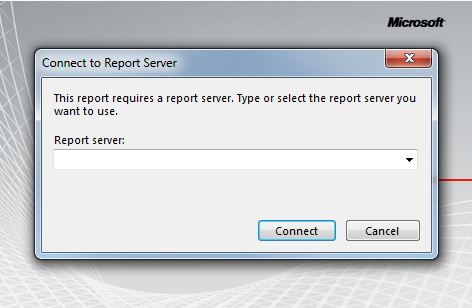
Important: When opening a .RDL file in Report Builder 2.0, you receive a prompt asking you to connect to a report server (screen shot below). This is not necessary. Click Cancel to continue. Please note that the default is Connect, you must click Cancel.
2. Set the page to the correct size.
a. Right click on the open space and select Report Properties
b. Set your Margins, Orientation and Paper Size
3. Add the code assembly
a. Right click on the open space and select Report Properties
b. Select the References section
c. Select the Add button for Assemblies
d. Select the ellipses and navigate to C:\Program Files (x86)\Microsoft SQL Server\Report Builder 2.0 and select the Siriusware.Reporting.Functions.dll
Note: Available Siriusware.Reporting.Functions methods are:
• RenderBarcode(<text to render>, <barcode type> [e.g. "QRCode", "Code128"], <barcode height in inches>, <image type> [e.g. "PNG"])
• Proper(string) - this takes a string in all caps (e.g., first_name) and makes it proper case. You can also just put in the whole name [first_name & ‘ ‘ & last_name] and it parses out each name and adjusts the case to be proper.
• EncryptNumber(<decimal value>) – this take a base 10 number and returns a string of the base 38 number
4. Adjust the Width size in Report Builder to the width of the page you are printing less the margin width (i.e., 8.5 inch page = 7.5 page in the design window when using .5 inch margins).
5. Right click in the design page and select Insert to add images, rectangles, text boxes, etc.
Note: These functions work in a similar fashion as most standard Microsoft document and publishing software.
Note: Images included in the .rdl must be embedded. Only embedded images will appear in the report layout. Also, ensure that image files are as small as possible. After saving the layout, check the file size of the .rdl. accesso recommends a file size is 1 MByte or less for optimal results.
a. You can add boards to text boxes and rectangles by right clicking the box and selecting Properties.
b. You can only Insert when selecting the Design page. Once added you can drag images or text boxes into rectangles.
c. If you put things into a rectangle they all move together.
Note: Placing report items such as text boxes on top of an image item is not supported by all Reporting Services rendering engines, including Report Builder 2.0. If this is necessary it is recommended to set the image as the fill of another report item, such as a rectangle or a cell in a table.
6. Creating hyperlinks
a. Highlight the text, right click it and select Action in Text Properties
b. Select the Go to URL radio button and add the hyperlink URL
Note: Report Builder does not change the font color for a hyperlink. To do so, you must adjust that after you have added the URL in font color)
7. Adding Data Source
a. Select New> Data Source on the Report Data pane and select the data source
b. Name the source, “SiriusSQL”
c. Select radio button for Use a connection embedded in my report
d. Connection type should be Microsoft SQL Server
e. Select Build… to create a connection string
f. Insert your server name
g. Select your database name (SiriusSQL) and select Test Connection to verify.
8. Add Data set (query)
a. Right click on your data source (SirusSQL) and select Add Dataset
b. Name your data set
c. Query type should be set to text for normal select statement
d. Test your data set query in Management Studio prior to inserting into Report Builder
Example Data set Query:
SELECT (SELECT TOP 1 c_logo FROM pictures) AS CompanyLogo,
p.pass_no AS PassNumber,
p.masterpass AS MasterPassNumber,
p.guest_no AS GuestNumber,
RTRIM(g.first_name) AS GuestFirstName,
RTRIM(g.last_name) AS GuestLastName,
CAST(g.mug_shot AS VARBINARY(MAX)) AS GuestPhoto,
p.swipe_no AS SwipeNumber,
p.addit_no AS AdditNumber,
p.wtp_no AS WTPNumber,
p.rfserial AS RFSerial,
p.[start_date] AS StartDate,
p.expires AS ExpiresDate,
p.department AS Department,
RTRIM(d.descrip) AS DepartmentDescription,
p.category AS Category,
RTRIM(c.descrip) AS CategoryDescription,
p.item AS Item,
RTRIM(i.descrip) AS ItemDescription,
p.amt_paid AS AmountPaid,
p.account AS Account,
p.operator AS Operator,
p.salespoint AS Salespoint,
p.date_time AS DateTimeSold
FROM gst_pass p
JOIN items i ON i.department = p.department AND i.category = p.category AND i.item = p.item
JOIN category c ON c.department = i.department AND c.category = i.category
JOIN departme d ON d.department = c.department
JOIN guests g ON g.guest_no = p.guest_no
WHERE p.pass_no = 1004001
9. Add dynamic data
a. Insert a text box and drag the dynamic field that you want on the report.
10. Inserting barcodes
a. Insert an image box
b. Right click on the image and select Properties
c. Name the barcode
d. Image source should be set to Database
e. Select image/png from the dropdown list for Use this MIME type
f. Select the fx next to Use this field to set the expression
g. Add the assembly reference
Example:
=Siriusware.Reporting.RenderBarcode("%" & Fields!PassNumber.Value, "Code128", 0.5, "PNG")
h. In Reporting Services DB Script expressions use & rather than + to add other information (see example above).
11. Hide/Show fields
a. Right click on text box properties
b. Select Visibility
c. Select Show based on expression
d. Add Expression
Example:
=Fields!ExpirationDate.Value> NOW()
12. Adding Parameters
a. Right click on Parameters in Report Data
b. Name the parameter pnPassNumber
c. Data Type must be set to Float
d. Default values can be set for testing in the Default Values tab
e. Add the parameter to the datas et query in the Where clause
Example:
Where pass_no = @pnPassNumber
Note: It is advised that you design a layout that is mobile friendly first in order to ensure that they work well with smart phone displays. Smaller Mobile layouts work fine as default layouts for web as well. If you are utilizing one mobile friendly layout, place this in
E-Ticket1.
E-Ticket1 is the default for .rdl layouts. If you have a regular layout and a Mobile layout, place the larger format layout in
E-Ticket1 and the mobile in
E-Ticket2 in SysManager setup (See
SysManager)