Installing SQL 2014 on Windows Server 2012 R2
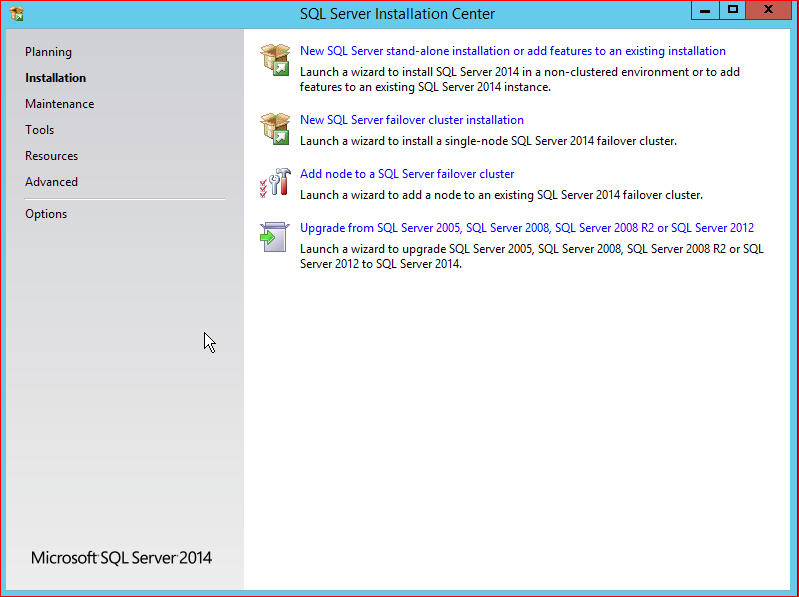
1. Choose New SQL server Installation.
2. Enter the Product Key.
3. Accept the License Terms.
4. Search for Product Updates.
5. Install Setup Files.
6. Install Rules – if all rules have a status of, “passed” click NEXT.
7. Setup Role – Choose SQL Server Feature Installation, and then click Next.
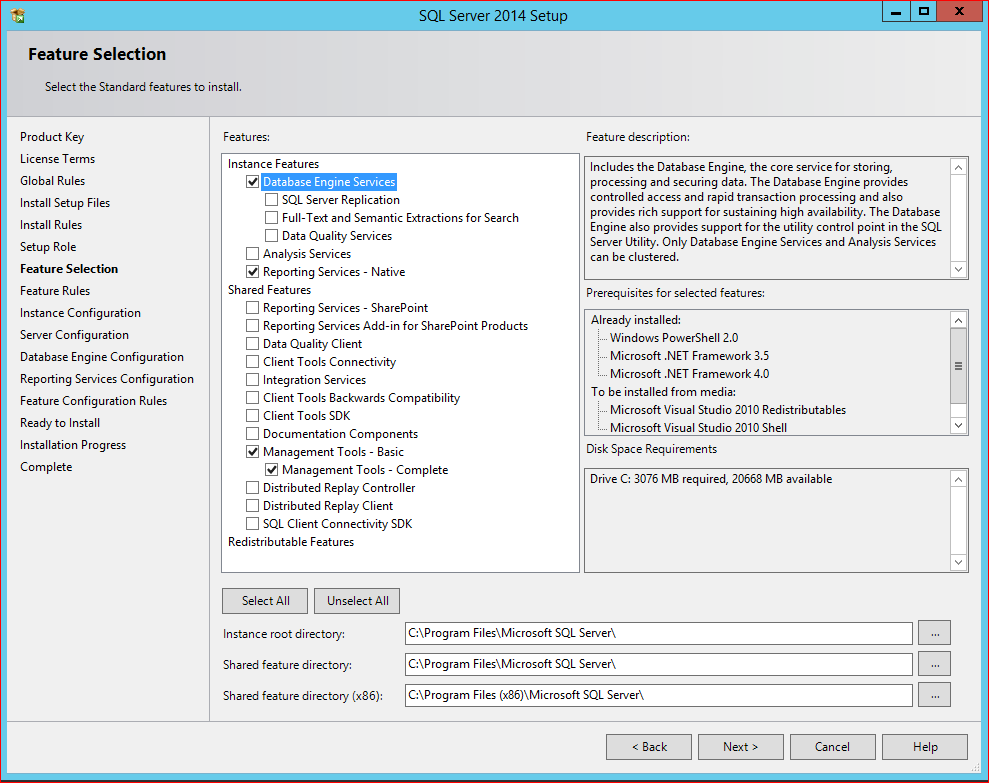
8. Feature Selection – Choose the features and specify your installation and root directory paths.
9. Instance Configuration: Choose Default Instance, and then click Next.
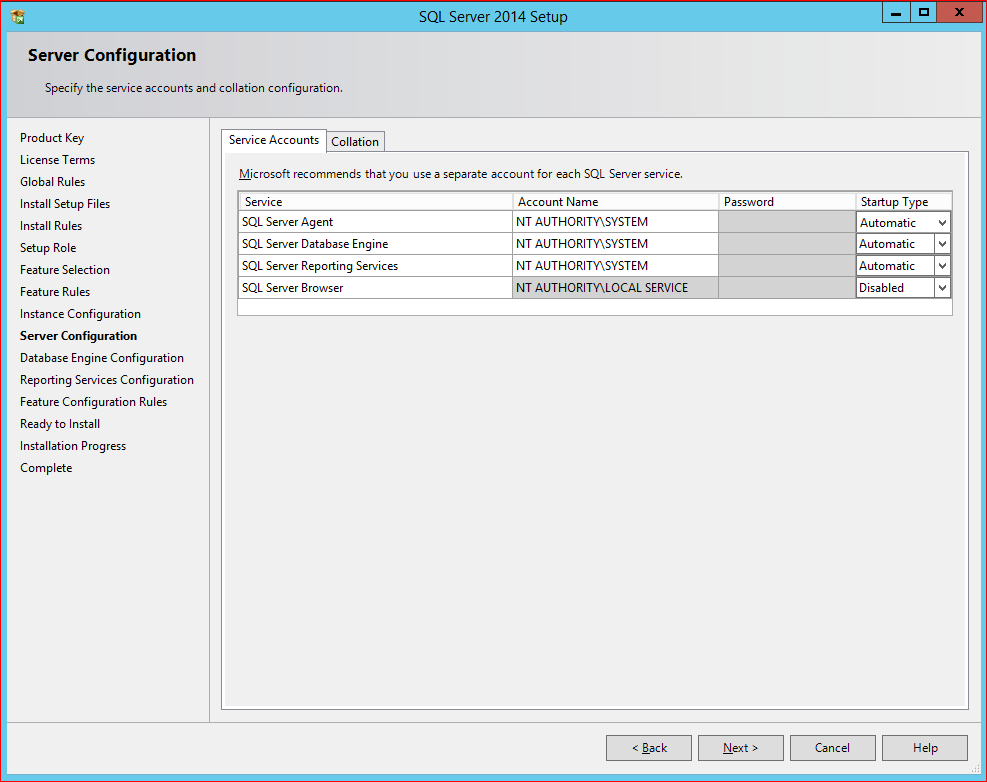
10. Server Configuration: Change the account name to NT AUTHORITY\SYSTEM and the Startup Type to Automatic for the SQL Server Agent, SQL Server Database Engine and SQL Server Reporting Services.
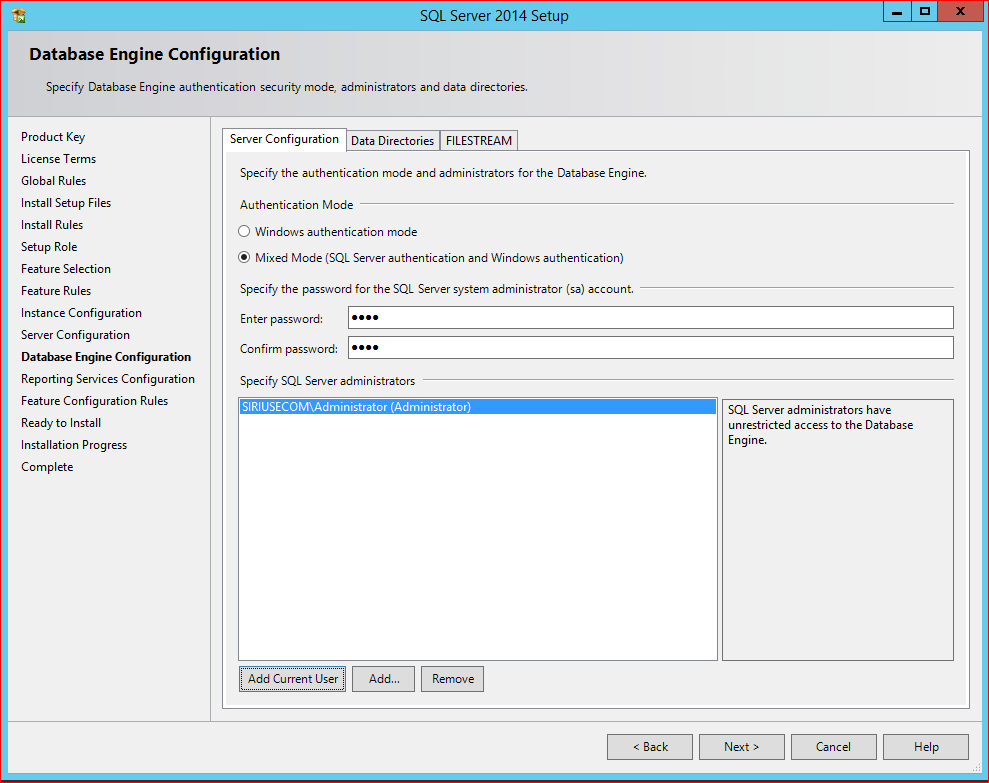
11. Database Engine Configuration: Choose Mixed Mode for the Authentication Mode. Specify a password for the SQL Server System administrator (sa) account. Add at least one additional Windows user, normally your domain administrator. If you wish to change the default location for the database and log files, click the Data Directories tab and specify the paths accordingly.
12. Reporting Services Configuration: Under Reporting Services Native Mode, choose Install and Configure, and then click Next.
13. Ready to Install: Verify the Installation Summary, and then click Install.