Installation steps
First pinpad installation:
1. From C:\Paymentech_iPP320, run cctagp1.exe
2. Navigate to File > Open and get C:\Paymentech_ipp320\TEST_826.cfg
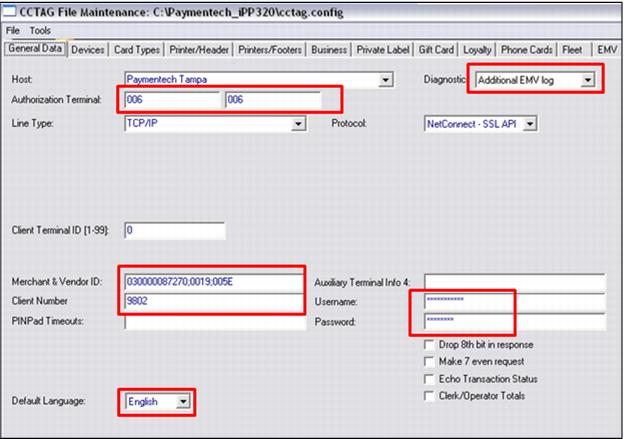
3. Edit General Data tab:
• Authorization Terminal – Set to unique pinpad ID, must be three digits.
• Diagnostic – Basic Level unless troubleshooting then set to Additional EMV log.
• Merchant & Vendor ID – Set to PNS#;0019;005E (0019 and 005E are static TenderRetail numbers for all clients).
• Client Number – set to Chase client number, must be four digits.
• Username and Password – set to client values for Chase NetConnect.
• Default Language – as appropriate.
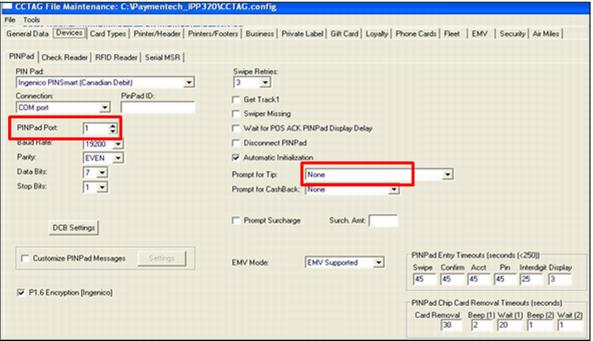
4. Edit Devices tab:
• Connection – Set to correct connection type, usually this is COM port unless you received USB pinpads.
• PIN Pad Port – Set to correct value.
Note: You do not need to change the port settings in Windows, the defaults work fine.
• Prompt for Tip – Set as appropriate (Credit and Debit Card include Pre-Authorization for tips).
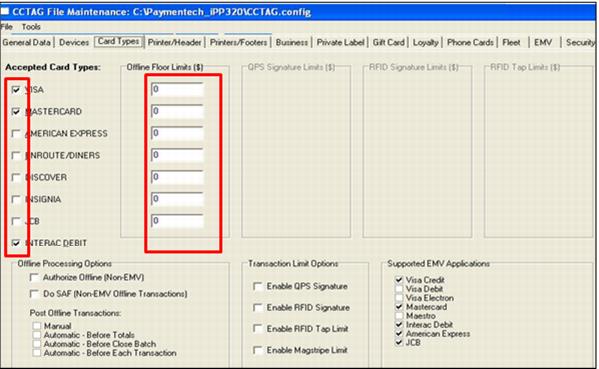
5. Edit Card Types tab
• Select Accepted Card Types to be used and Offline Floor Limits if appropriate.
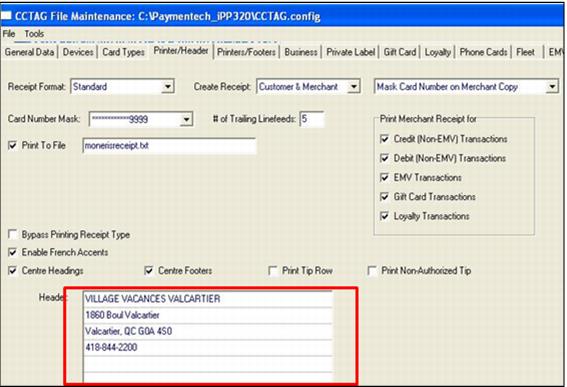
6. Edit Printer/Header tab:
• Enable formatting as appropriate.
• Enter client Header information.
7. Edit Printers/Footers tab – As appropriate for client.
8. Navigate to File and Save As C:\Paymentech_iPP320\CCTag.config.
9. Save this file to a central location (Create a Pinpad folder in the Siriusware shared folder) for subsequent pinpad installations.
10. Follow instructions to create EMV Files.
Create EMV files
1. Go to Tools > Create EMV Files and select.
Note: this could take up to thirty seconds on a slow computer. There is no messaging when the EMV files are created. Any error probably indicates that cctagp1.exe was not run as administrator.
2. Go to File > Exit.
3. Test the pinpad by following the steps listed in Pinpad testing below.