Installing the default web pages on Windows Server 2008/2012
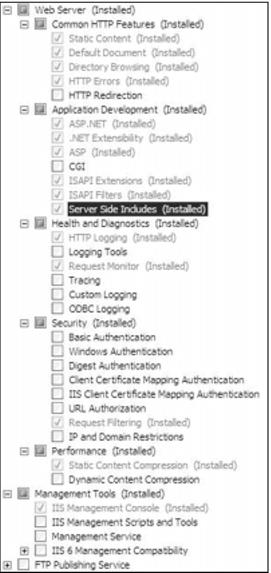
Note: In Windows Server 2008, you must create a Server Manager role. When creating the Server Manager role in the Server Manager, ensure that the following radio buttons are selected:
Note: When installing pages in Windows Server 2012 on IIS8 you need to comment out a line in the web.config. Insert the bolded comments (<!--…-- >) around the staticContent section
<!-- the following causes stylesheet issues in IIS8. Comment out the <staticContent> section in IIS8 and above. -->
<!-- <staticContent>
<mimeMap fileExtension=".woff" mimeType="application/x-font-woff" />
</staticContent> -->
To install the default pages on Windows Server 2008/2012:
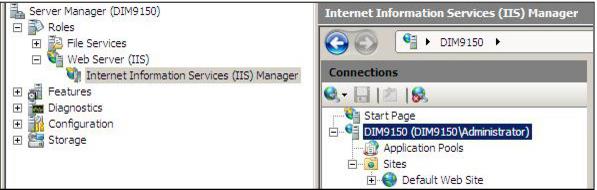
1. Go to Start > Administrative Tools > Server Manager and expand Roles by clicking on the +.
2. Expand Web Server (IIS) by clicking on the +.
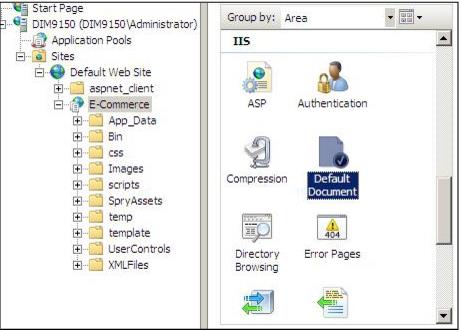
3. Click on Internet Information Services (IIS) Manager, and then drill down to the Default Web Site, as shown in the following screen capture:
4. Expand the folder Default Web Site, and then right-click on it (Default Web Site).
5. Select Add Virtual Directory and the Virtual Directory dialog is displayed.
6. Enter E-Commerce as your Virtual Directory Alias:.
7. Select the physical path by clicking the ... button and browsing to C:\inetpub\wwwroot\ and highlighting it.
8. Click the Make New Folder button and name the new folder E-Commerce. Click OK.
9. From the Add Virtual Directory dialog, click Connect as... .
10. From the Connect As dialog, ensure that the Application user (pass-through authentication) radio button is selected. Click OK.
11. From the Add Virtual dialog, click OK.
12. Copy the eCommerce_Pages_xxxx.exe file to your new E-Commerce folder.
13. Double-click on the file to unzip it.
14. Right-click on the E-Commerce folder and select Convert to Application.
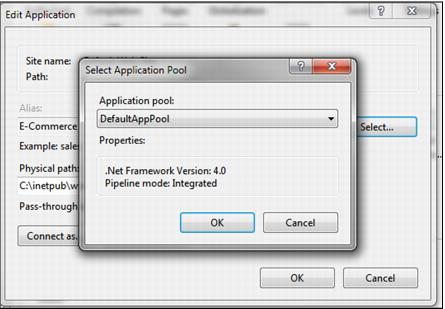
15. On the Add Application dialog, click the Select... button and select the DefaultAppPool from the Application pool: dropdown, as shown in the following screen capture.
16. Click OK, and then click OK again.
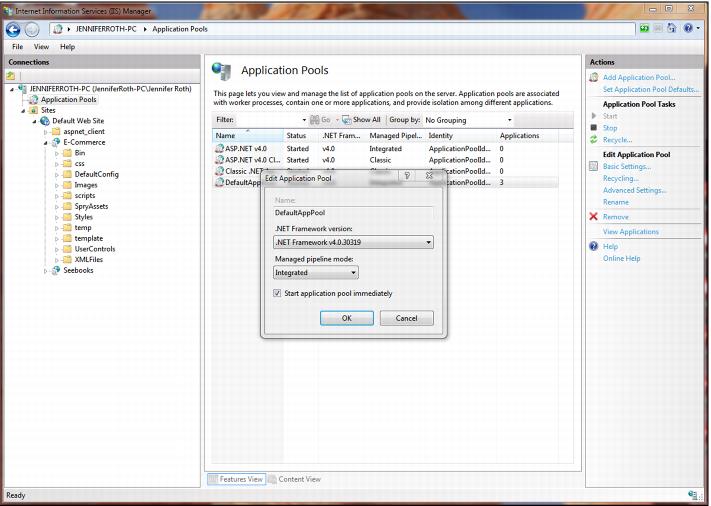
17. Click on Application Pools > DefaultAppPool > Basic Settings, as shown in the following screen capture. On the Edit Application Pool dialog, ensure that .NET Framework v4.0.30319 is selected from the .NET Framework version: dropdown and that Integrated is selected from the Managed pipeline mode: dropdown. Click OK.
18. For the E-Commerce site, right-click on the Authentication icon again and select Edit Permissions... .
19. On the E-Commerce Properties dialog, click the Security tab and verify that the IIS users account is listed in the Group or user names list. If it is not there, add it (the username is always going to be IIS_IUSRS(<servername>\IIS_IUSRS).
20. Select the IIS user’s account. Under Permissions for IIS_IUSRS, select Read & Execute and that automatically selects List folder contents and Read. Verify that there are no write permissions selected. Click OK.
Note: When setting up in IIS for Windows Server 2008 64-bit platforms, you have to go into the application pool’s Advanced Settings and set Enable 32-bit to True. Without this setting in place, the pages won’t run. This setting is not visible at all in IIS on 32-bit Windows Server 2008 platforms.
Note: Performing an iisreset command from a command prompt is an easy way to ensure that any changes you make in IIS take effect immediately.
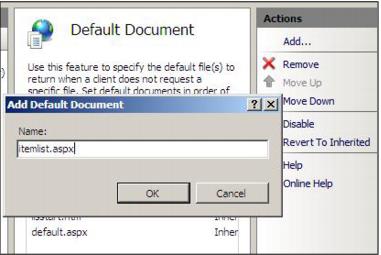
21. In the IIS area, double click on the Default Document icon. See the following screen capture.
22. In the Actions panel, click Add. On the Add Default Document dialog, enter itemlist.aspx and click OK. See the following screen capture.
23. Ensure that itemlist.aspx appears at the top of the list.
24. In the IIS area, double click on SSL Settings icon to see where you would install your SSL Certificate using the Client Certificates radio button (if you are going to take credit cards, you need to do this).
25. Once your SSL Certificate is installed, all of the pages run under HTTPS.
26. Place the eCommerce_Pages_Config_xxxx.exe file into your new E-Commerce folder and double-click to unzip into the folder.
27. Copy default configuration files
• Copy all files and folders from C:\Inetpub\wwwroot\E-commerce\DefaultConfig to C:\Inetpub\wwwroot\E-commerce
• Delete C:\Inetpub\.wwwroot\E-commerce\web.config
• Rename web.config.default to web.config
28. Ensure the \IIS_IUSRS has Modify permissions in the following files/folders:
• Folder: C\Inetpub\wwwroot\E-commerce\Images
• Remove the Read-Only check mark on this folder.
• Folder: C:\Inetpub\wwwroot\E-commerce\XMLfiles
• Remove the Read-Only check mark on this folder.
• Folder: C:\Inetpub\wwwroot\E-commerce\Siteconfig.config
29. If you are using IIS 8 or above, you must edit the web.config and comment out or remove the <staticContent> section or the pages will be unable to load the style sheets.
30. If your pages are installed on the same computer as ww.dll, you can start Internet Explorer and go to http://localhost/E-Commerce to display the default page itemlist.aspx. Alternatively, you can click the Browse Application link in the Actions panel, as shown in the following screen capture.
31. If your pages are installed on a separate computer from ww.dll, you need to install wwService before pointing Internet Explorer to http://localhost/E-Commerce to display the default page.