How to install a printer and driver
To install a printer, simply connect it to the network or attach it directly to a salespoint using a serial or parallel port (depending on the interface(s) available for the printer).
To install a driver, go to Start > Printers and Faxes. Click the Add Printer wizard. Select whether the device is connected locally or over a network. If it is connected over a network, navigate to the device and select it. If the device is connected directly to the computer (salespoint), select the port to which it is connected. However, the majority of printer installs for Salesware are done by plugging in the hardware, and then installing the generic driver using the Found New Hardware Wizard that automatically pops up. The exception to this is setting up the CASHDRAWER printer (which is used only to pop the cash drawer); the CASHDRAWER printer is a virtual printer with no detectable hardware. The CASHDRAWER printer can be connected to a receipt printer or directly to the salespoint. For more information on the configuration options for the CASHDRAWER printer, see the documentation for the ports.INI file in the Salesware .INI Settings Reference document and the Sales > Tools > Sales Pt Setup > Cashdrawers button.
If you are using drivers from the manufacturer, be sure to consult your owner’s manual, because many printers require a very specific order of installation to get the printer to work at all. For example, many USB printers require running the install disk with the cord unplugged; you are prompted to plug in the cord at a specific time during the install or the install fails.
The printer name is important; Siriusware Inc. requests that when printers are installed they are name appropriately for their functions.
Example:
When installing a ticket printer, rename it to TICKET; when installing a receipt printer, name it RECEIPT; pass printer, PASS and so on. This way, when you define the printer in the Sales interface it makes sense. Also, there are many times when more than one Generic/Text Only printer is installed and you cannot have two printers with the same name.
To install a manufacturer-supplied driver:
1. Plug the hardware into the computer.
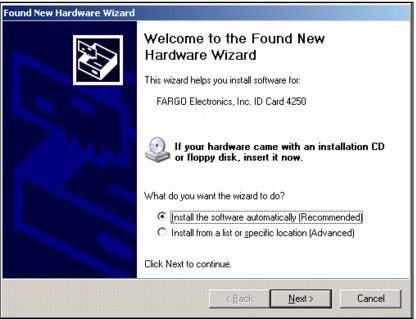
2. You are presented with the Found New Hardware Wizard.
3. If you are installing a manufacturer-supplied driver, first try selecting the Install the software automatically radio button and click Next.
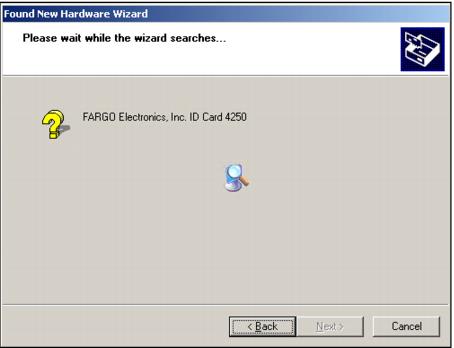
4. You are presented with a dialog that indicates Windows is searching for the driver for the new hardware.
5. If the driver is found, complete the remaining steps for the Found New Hardware Wizard and your new printer appears on the Start > Printers and Faxes dialog.
6. If the driver is not found, you have to select the driver yourself. Obtain the driver from a disk you received with the printer or go to the manufacturer’s web site.
7. Click Back to return to the Main dialog of the Found New Hardware Wizard.
8. Select the Install from a list or specific location radio button. Click Next.
9. From the Please choose your search and installation options dialog, you direct the wizard where to search for your driver. In this example, we downloaded the driver from the manufacturer's Internet web site to the desktop for installation from there.
10. Select the Don't search. I will choose the driver to install radio button. Click Next.
11. Select the Printers hardware type, and then click Next.
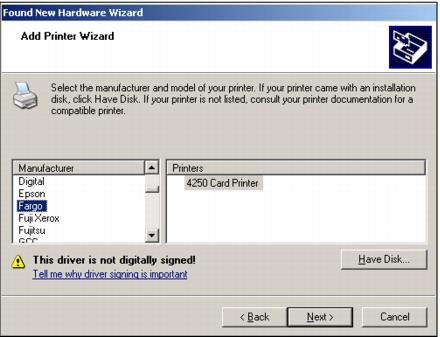
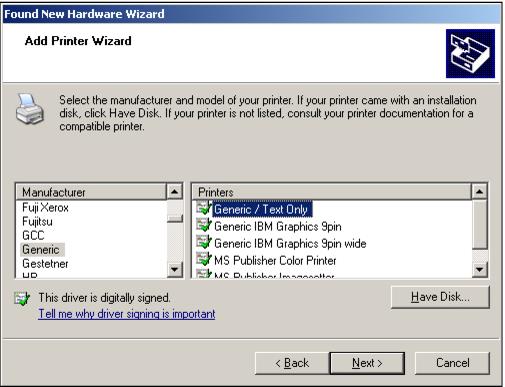
12. Select the Manufacturer and Printer. Click Next.
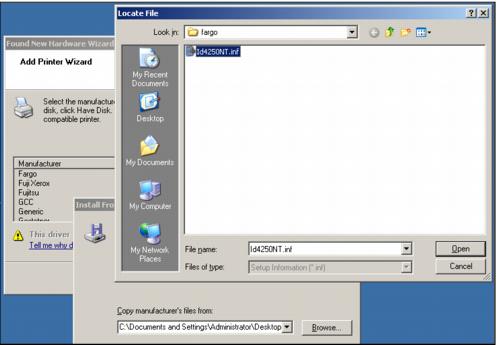
13. Select Have Disk... and Browse... to the driver.
14. Select the driver and click Open.
15. Click OK, and then Next to complete installation of the driver.
To install the Generic/Text Only driver:
1. Plug the hardware into the computer.
2. You are presented with the Found New Hardware Wizard.
3. Select the Install from a list or specific location radio button. Click Next.
4. From the Please choose your search and installation options dialog, select the Don't search. I will choose the driver to install radio button. Click Next.
5. From the Manufacturer column, select Generic. From the Printers column, select Generic/Text Only. Click Next.
6. The wizard installs the driver and the Generic/Text Only printer appears on the Start > Printers and Faxes dialog.
Alternatively, you can use the Add Printer wizard to install a printer and driver, as shown in the following example.
Example of installing a receipt printer (Star TSP) with a Receipt layout:
1. From SysManager > Preferences > Miscellaneous > Receipt Layout, check that the Short scroll box contains a valid layout.
2. You do not need to associate the Receipt layout with the application, because this association is already “hard-coded” into Sales (for a listing of layouts and the applications with which they are associated, see the table in
Specific layout applications).
3. Connect the Star TSP receipt printer to the salespoint. This is usually done using a serial (USB or COM) port.
4. Launch the Start > Printers and Faxes > Add Printer wizard.
5. Select Local printer attached to this computer. Click Next.
6. Select the port (probably COM1). Click Next.
7. Select Generic from the Manufacturer dropdown. Click Next.
8. Retain the Generic/Text Only name under Printer name:. Click Next.
9. Finish the wizard, selecting configuration options as appropriate for your environment.
10. Go to the Sales > Tools > Sales Pt Setup > Printing > Page 2 tab.
11. From the Windows Printer dropdown, select Generic/Text Only.
12. From the Dot Matrix Printer dropdown, select the Star TSP model that you installed.
13. From the Report dropdown, select 40 Column Non-Graphic.
Make a sale and see if the device works. If it does not print, check whether a print job was sent to the device by going to Start > Printers and Faxes. If no print job was sent (there is nothing in the queue for that device), then there was a problem when you associated the device with the application from Sales > Tools > Sales Pt Setup > Printing. If there is a print job in the queue but there was an error, then there is a problem with the device you selected from the Dot Matrix Printer dropdown or the device was not installed properly to start with.
Note: If receipt printing is not enabled, a receipt does not print. Receipt printing of items can be enabled in two different places. It can be enabled on an item-by-item basis from the SysManager > Activities > DCIs > New/Edit > Printing tab > Print On Receipt button. Or you can set the salespoint to print a copy of the receipt for every sale from Sales > Tools > Sales Pt Setup > Miscellaneous > Print Receipt. You can also press the Reprint button in Sales to print a receipt on demand.