Installing Reserved Seating (RSWebApp)
In order for the Reserved Seating module to work properly, E-Commerce and Salesware Service applications must be installed. Please refer to the
Installing Salesware Service and the
E-Commerce Installation Guide for specific instructions on installing these modules.
1. Create a directory called, “ReservedSeating” in C:\wwwroot\inetpub.
2. Take the c_RSWebApp_*.exe file for Reserved Seating module and extract it to C:\wwwroot\inetpub\wwwroot\ReservedSeating.
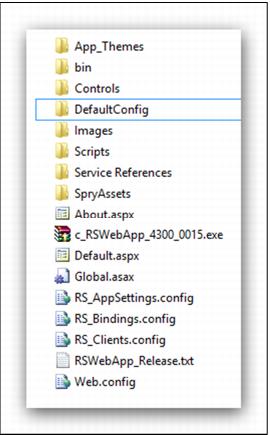
3. Copy all the files and folders from the DefaultConfig folder up one level to the ReservedSeating folder. It looks similar to this:
4. Adjust the following settings within the RS_AppSettings.config file for Reserved Seating module as necessary.
Note: The RS_AppSettings.config exists in BOTH the E-Commerce folder and in the ReservedSeating folder. They should both be examined and updated appropriately. Choose operators and salespoints.
<appSettings>
<add key="REMOTE_SWS" value="1"/>
<add key="ServiceURL" value="http://localhost/SaleswareService/SaleswareService.svc/ResvSeat/soap" /> <add key="OperatorID" value="ESALES"/>
<add key="Password" value="RSAPP222"/>
<add key="Salespoint" value=""/>
<add key="RSLogfile" value=""/>
<add key="RSLogfilePath" value="C:\ProgramData\Siriusware\ReservedSeating"/>
<add key="RSLogVerbosity" value="5"/>
<add key="ValidationPrefix" value="P"/>
<add key="ShowImagesLocationType" value="LOCAL"/>
<add key="ShowImagesLocation" value="C:\inetpub\wwwroot\ReservedSeating\Images\ShowImages"/>
<!--Use LOCAL when images are inside this same website. Example: value="/Images/ShowImages/"-->
<!--Use REMOTE when images are in another location (even if it is another website inside the same server). Note the "/" at the end of the URL-->
<!--Example: value="http://www.xyz.com/images/" or value="http://localhost:3000/XYZ/Images/"-->
<!--<add key="ShowImagesLocationType" value="REMOTE"/> --> <!--possible values: "LOCAL" or "REMOTE"-->
<!--<add key="ShowImagesLocation" value="http://localhost/E-Commerce/images/"/> -->
</appSettings>
• Service URL is the location of Salesware Service application
• UserID and Password matches the operator record configured in SysManager.
• RSLogfile can be used to set the log filenames.
• RSLogfilePath is where to generate log files
• RSLogVerbosity controls how much information is logged.
• ValidationPrefix is used to establish the Access Control Prefix configured for passes/memberships.
• The ShowImagesLocationType is used to establish if the Show Images are stored directly within the same site or if they are located outside of the site.
• The ShowImagesLocation points to the location where .JPGs that display on the Show Calendar are stored. Your E-Commerce site and your regular salespoints can both point to the same folder.
Note: Leave the salespoint value empty to have the system use the name of the salespoint where the actual booking process is occurring.
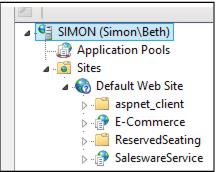
5. Start IIS Manager. Expand the Sites option to see the ReservedSeating folder listed under Default Web Site.
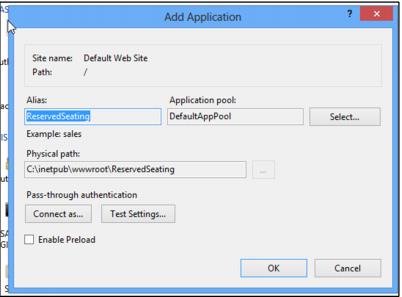
6. Right-click on the ReservedSeating folder and choose Convert to Application. On the Add Application dialog, choose DefaultAppPool as the Application Pool. Press OK.
7. Give the IIS_IUSR user modify permission on the images folders (And uncheck the Read-Only check boxes) in both the C:\inetPub\wwwRoot\E-Commerce and C:\inetPub\wwwRoot\ReservedSeating folders.
8. Test the Reserved Seating module installation by browsing to localhost/ReservedSeating. If you see the message, “Waiting for client to verify that it is authorized to call this module”, then the Reserved Seating module installation is successful. Because this component is designed to be called from Sales, not directly from a web browser.