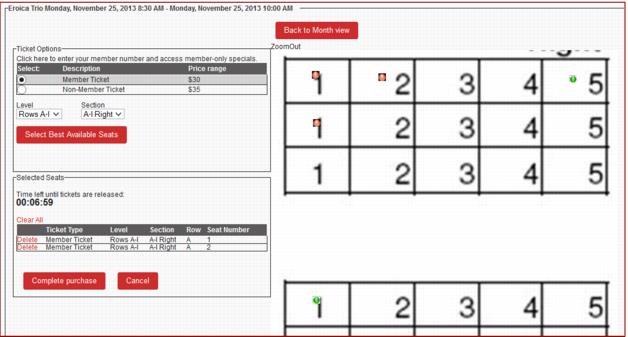
Select-A-Seat process
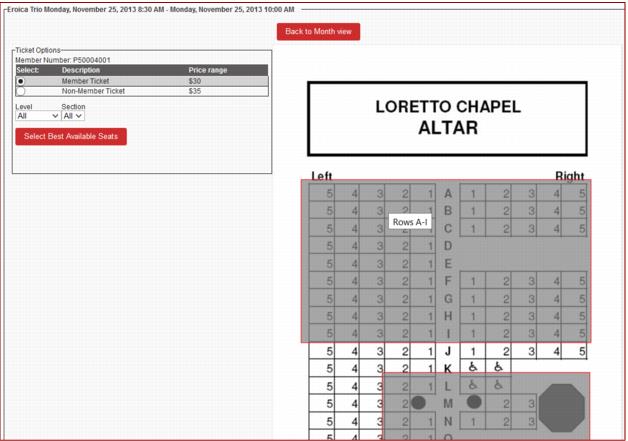
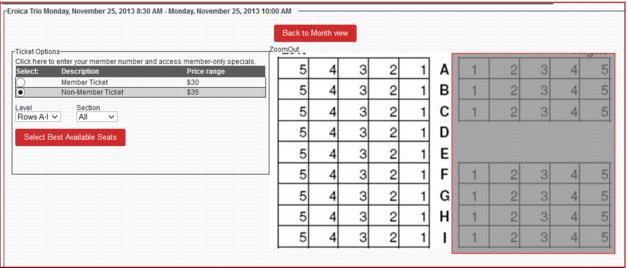
1. To select a seat, the guest must first select a ticket type (the first ticket type on the grid is always selected by default) using the radio buttons in the Ticket Options section.
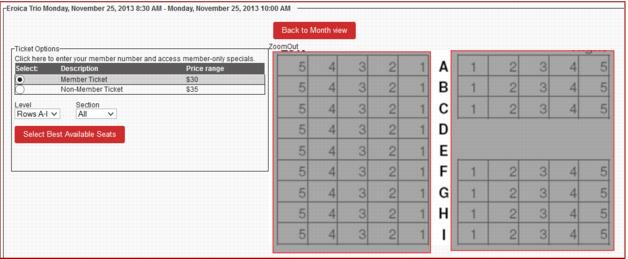
2. Then, the guest selects a Level and Section either by selecting from the dropdown boxes within the Ticket Options window or by directly clicking on that area on the seat map.
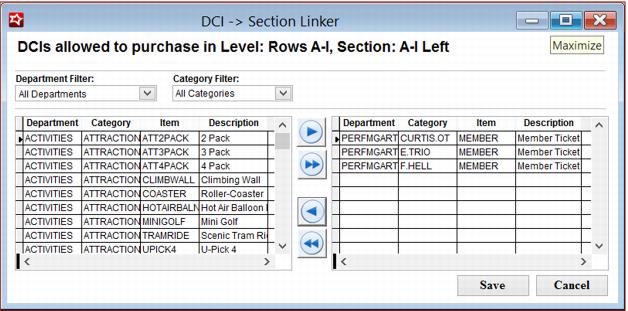
Note: Only those sections that are available for the ticket type selected appear. Items set up with pass-link restrictions in SysManager, as in the example screen below, do not appear on the map.
3. Seats are shown with the seat indicator images defined by the configuration that was set by the client within SysManager.
4. To select an open seat, the guest must click on it and the selected seat is then added to the Selected Seats grid. The hold timer starts with each seat selection. Multiple seats can be added and/or deleted to/from this grid. When a seat has been selected, the indicator changes to indicate that the seat is on hold.
5. Once all desired seats have been selected, the guest clicks on Complete Purchase to add the seats to the cart.