Use
Operators can view the Resource Scheduling calendar without a license. This is read-only access so does not allow modifications to the calendar, but allows the operator to select Group Schedule and view the month, week and day reservations. Otherwise, the salespoint needs to be licensed for Resource Scheduling module.
To make a Resource Scheduling sale:
1. In Sales, click on the Create a New Reservation Header button to create the Reservation Header.
a. Specify the guest Name.
b. Specify the Account/Group Information.
c. Specify # in Group.
d. Specify the Important Dates.
e. Specify all required Reservation Info.
f. Specify Remarks if applicable.
2. Click OK to close the Reservation Header.
3. Click the Group Schedule button.
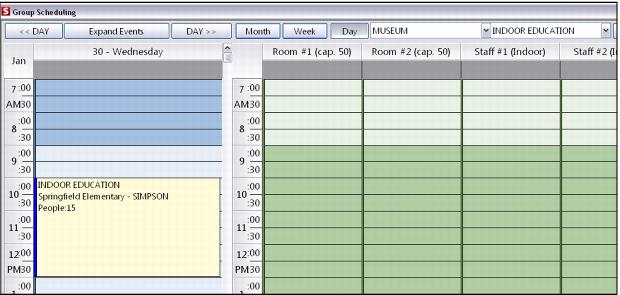
4. From the Month view (default), display the month that contains the reservation just entered through the ResHeader and double-click on the day of the month that shows the reservation.
5. The Day view is displayed as shown in the following screen capture:
6. Each column on the right is labeled with a group schedule event types. Press your left-mouse button and drag to make a block of time that you want to schedule for the event. If you accidentally block out the wrong time period, click your right mouse button with the cursor somewhere over the event and select Delete from the pop-up menu.
7. Click Done to close the Group Scheduling dialog.
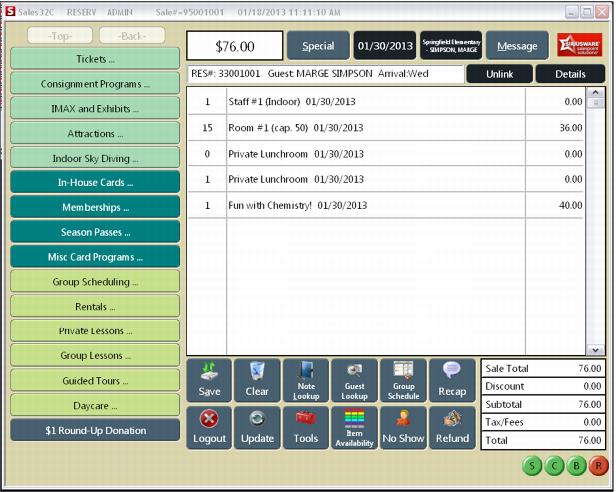
8. The sale now includes the items that have a time blocked out in the calendar. Item quantity can be changed in accordance to the nature of each resource.
Note: If an item has a time span associated with it, that time span is respected and input into the Group Schedule. To have flexible booking times, leave the time span empty for the item.
p
9. Save the reservation.
To recall a Resource Scheduling sale:
1. A saved reservation with Resource Scheduling functionality can be recalled through the Recall button as you would do for any other reservation.
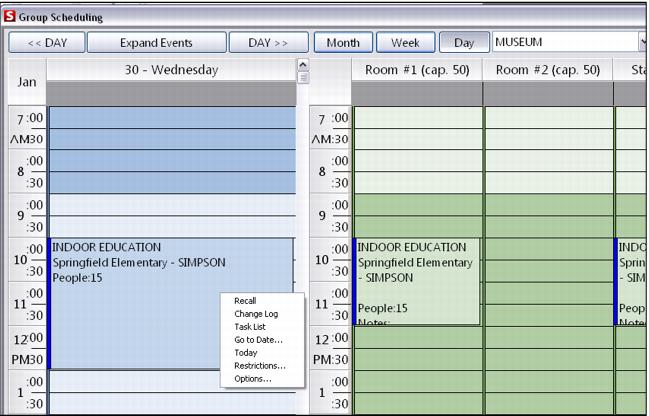
2. Other reservation-related information can be viewed from the Group Scheduling dialog by right-clicking on the event description in the Day view.
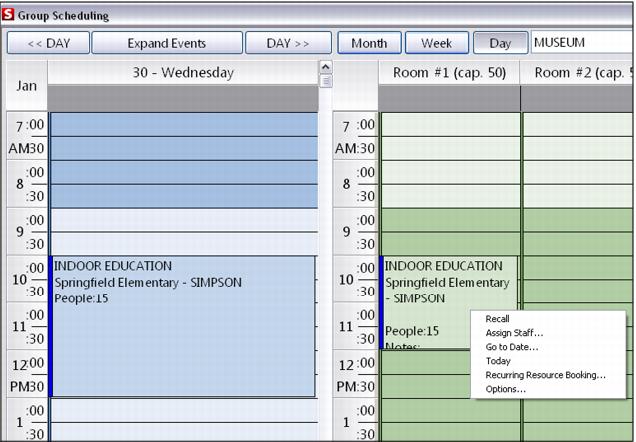
3. Each resource view also provides options to recall the reservation, assign staff to a resource and other functions, as shown in the following screen capture.
Note: When assigning staff to a resource, you assign staff to a resource assignment and not the entire day. That way you can assign one staff person to one event and another to another event.
4. Adding Used Resources to the filter in the calendar displays only used resources. All resources without bookings are removed.
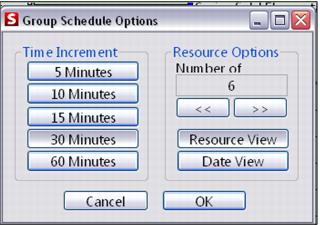
5. The Options selection from the pop-up menu allows customization of the appearance of the Group Scheduling dialog: