Matrix templates
The matrix template is the grid formed by paired matrix attributes that allow for inventory information to be stored for each size/color, style/color and color/brand combination of a main item. A matrix template may be used for multiple main items as in the case of a size/color matrix that has all necessary combinations for a variety of T-shirts, golf shirts and sweatshirts. However, if the color descriptions are very manufacturer specific (Red for the Plain T-shirt company and Chili for the Now T-shirt company), then you need multiple matrix templates to accommodate the color descriptions. In the same fashion, if you sell ski boots from three different manufacturers, you probably want one matrix template for each manufacturer to keep the different size/color combinations recognizable and able to be tracked. An unlimited number of matrix templates can be created.
To create matrix templates:
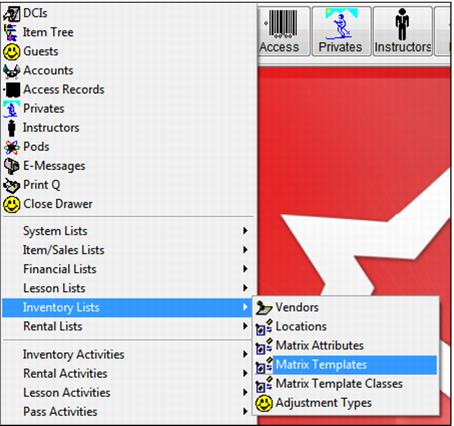
Go to SysManager > Activities > Inventory Lists > Matrix Templates. See the following screen capture:
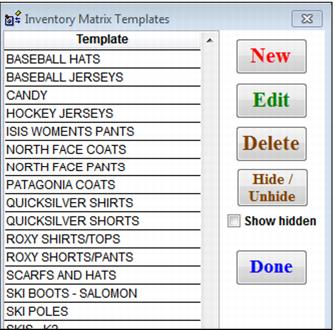
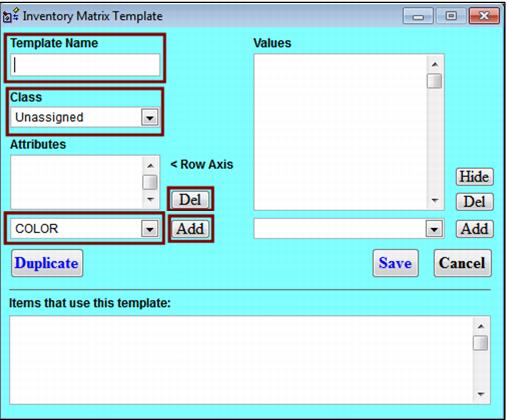
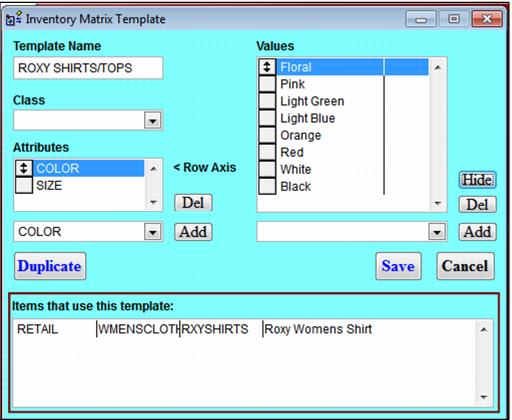
Click New to create new Matrix Templates. See the following Inventory Matrix Templates dialog and Inventory Matrix Template dialog screen captures:
Begin by creating a Template Name. This could be Woman’s Shirt if it applies to all the woman’s shirts in your product line or Atomic Boot if it is to be used only for the ski boots manufactured by Atomic. If you created matrix template classes above, select the correct Class for this new template.
Next, from the matrix attributes list in the dropdown list below the Attributes window, select one of the two attributes that make up this template. Click Add to place it in the Attributes window. Do the same to Add the second attribute for this template.
If you happen to Add the wrong Attribute to the window, highlight it and click Del to remove it and allow for the addition of the correct Attribute (the software does not allow you to create a template with more or less that two Attributes).
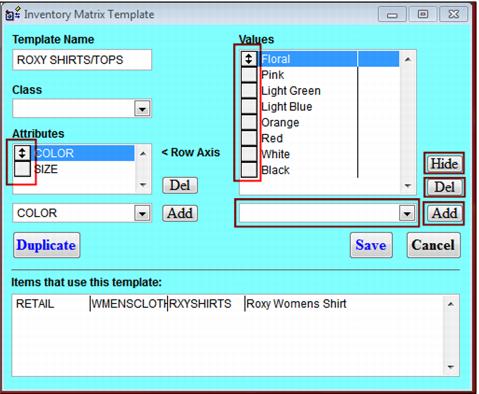
The Attributes selected appear in the final template with the first Attribute on the vertical axis and the second on the horizontal axis. To change this, click and drag the button to the left of the Attribute to a new position.
Next, add Values for each of the Attributes that you selected. Highlight one Attribute and select a value for this Attribute from the dropdown list below the Values window. The first template that you create has no Values in the dropdown list below the Values window, so just type the value in the dropdown list box. Click Add to place the value in the Values window. As you create new Values they become part of the Values dropdown for easy selection when creating other templates.
Create the Values for the other Attribute by highlighting it and repeating the steps above.
The order of appearance in the Values window is how the values appear in the final matrix template. Click and drag the button to the left of the value to change its position.
Use the Del button to remove a value that you do not wish to be in the template.
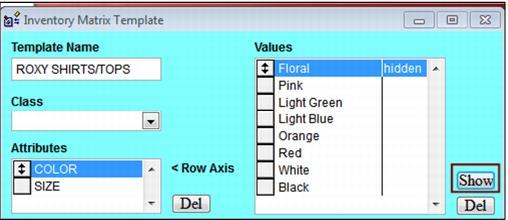
Use the Hide button to remove a value that is no longer to be ordered or sold yet needs to remain on inventory reports. The hidden value no longer appears on the Item Inventory tab, PO’s, Inventory Lookup, etc. Click Show to un-hide the value and make it available again.
You may have a need to create several templates that are the same except for some variations in one or both Attributes. In this case, determine your basic template and use the Duplicate button. All features of the template are duplicated except the template name. Give the duplicate a new name and delete/replace Attributes and/or Values as needed.
As templates are assigned to inventory items, the DCI and item description for each appears in the Items that use this Template window. This can be especially useful in understanding how sweeping a change in the template Values might be.