Printing options
Retail labels are printed from three different places in the SysManager User Interface (UI):
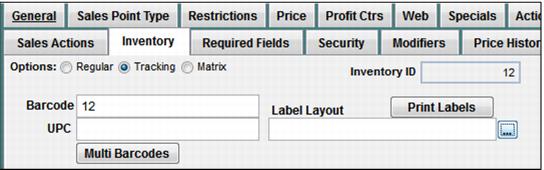
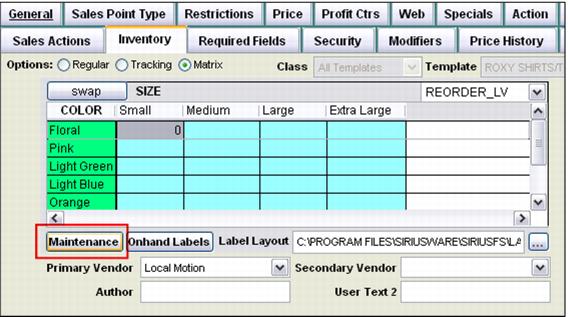
1. From the same place where the layout is associated with the item in the DCI: Activities > DCIs > New/Edit item > Inventory tab. This is generally useful for printing one or a few labels to replace ones that are damaged or missing.
• For tracking items, click the Print Labels button on the Inventory tab. Select the number of labels desired from the Print dialog.
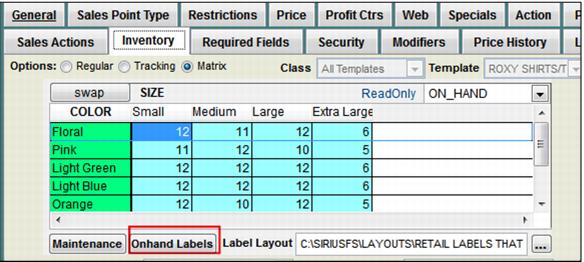
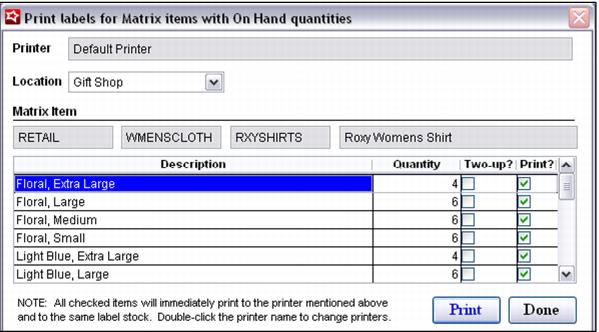
• For matrix items, click the Onhand Labels button on the Inventory tab to print on hand labels. Modify the print job based on selections on the Print Labels dialog.
Note: The Two-Up? Column on the print grid allows two identical mini labels to be printed on a single physical label. For these layouts, only half the quantity is necessary to print. The Two-up? column is pre-checked if the string "TWO-UP" appears anywhere in the label name (such as Matrix_Label_Two-Up.frx). The on-hand quantity is divided in half for printing in this scenario as you are getting two labels per page. This layout has the same exact fields copied like this:
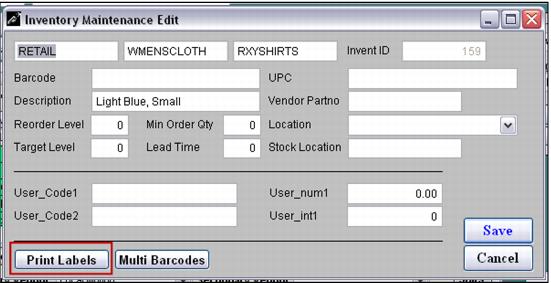
• For matrix items, labels for individual matrix item component items can also be printed in quantities not related to on-hand inventory. After clicking Maintenance, double-click on the cell for the component item. Then, click the Print Labels button on the Inventory Maintenance Edit dialog. Select the desired quantity on the Print dialog.
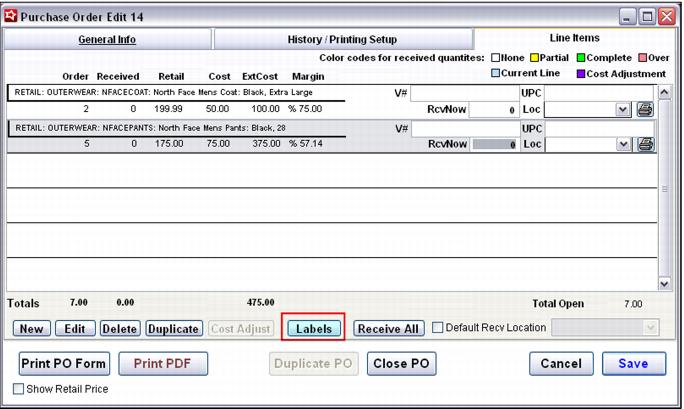
2. When inventory is order or received on a PO: Activities > Inventory Activities > Purchase Orders > Lines Items tab > Labels button.
• When printing when inventory is ordered, click the Labels button to print labels from each item in the quantity ordered.
• Confirm printing choices on the Print Labels dialog.
• Printing labels for individual items in quantities unrelated to order quantity can be done by clicking the printer icon at the right of the entry for a particular item and specifying the quantity on the Print dialog.
• When printing when inventory is received, click the Labels button as described previously. The quantity for each item on the Print Labels dialog is entered as received. Confirm printing choices and print. Also, as described previously, click the printer icon at the right of any entry to print labels unrelated to the quantity received.
3. During inventory lookup: Activities > Inventory Activities > Inventory Lookup.