Manually attaching the SiriusSQL database
There are a couple scenarios in which you may need to manually attach the SiriusSQL database, instead of using the Server Files installer:
• When updating your installation from SQL Server 2005 to SQL Server 2008 or 2012.
• When you are moving an existing database from one instance of SQL Server to another.
If the SiriusSQL database is detached from an instance of SQL Server, and then re-attached at a later time, no steps in addition to what is normally done from SQL Server are necessary. But in the manual attachment scenarios just listed, additional steps are required. These steps are presented in this section.
To attach the SiriusSQL database, you need the four files that comprise the database:
• SiriusSQL.MDF
• SiriusSQL.LDF
• SiriusSQL_LOGS.NDF
• SiriuSQLTRANSACT.NDF
Note: The directions provided in this section apply primarily to attaching an existing SiriusSQL database. If you need to attach a new, “clean” SiriusSQL database, use the Server Files installer as described in
Installing Server Files.
To attach the SiriusSQL database to SQL Server 2008/2012:
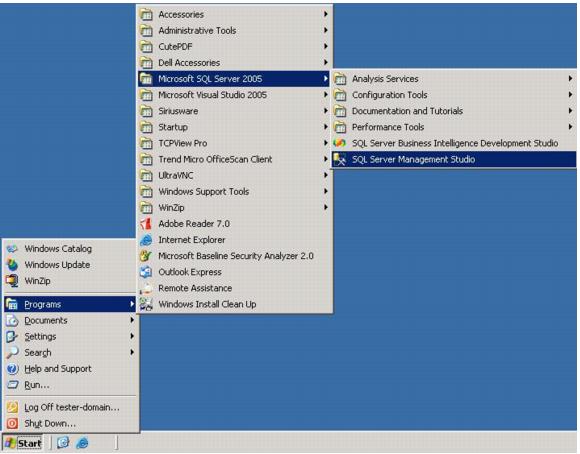
1. Start SQL Server Management Studio.
Note: If you cannot find an entry to start SQL Server Management Studio from the Program list as shown above, go to C:\Program Files\Microsoft SQL Server\90 or 100 or 110\Tools\Binn\VSShell\Common7\IDE and double-click on the file named SqlWb.exe (to run the SQL Server Management Studio).
2. Log into the SQL Server Management Studio by selecting:
a. Database Engine for Server type.
b. Server name from the dropdown list. The current Server name displays by default, but you can browse to connect to another server too.
c. For SQL Server 2008/2012 on Windows Server 2008/2012, be sure to use Windows Authentication. If you use SQL Server authentication when manually attaching a database to SQL Server 2008/2012 on Windows Server 2008/2012, the database attaches in read-only mode and the wrong compatibility level is set.
d. Click Connect.
3. Right-click on Databases and select Attach….
Note: In rare circumstances, you may want to detach a SiriusSQL database and attach a different one (as opposed to attaching a SiriusSQL database for the first time).
Note: When a SiriusSQL database is detached and reattached on the same computer, you don’t have to delete and recreate the two instances of the sirius user, but it is still a good idea. That’s because the sirius user was already created on this SQL Server computer, so the ID number that is used internally to identify the sirius user matches. If you take this database and attach it to another SQL Server, however, the IDs won’t match and you’ll get an error. That is why it’s always safest to recreate the sirius user.
4. From the Attach Databases dialog, click the Add button, and then browse to the SiriusSQL.mdf file. Select the file and click OK. All the data files are displayed.
5. If you need to change the database name to SiriusSQL, click on the current default name under Attach As and type in SiriusSQL.
6. Click OK to move on after you are sure everything on this dialog is correct.
7. Now, expand the Databases folder and right-click on SiriusSQL and select Properties. On the Database Properties – SiriusSQL dialog, on the left side, select Options. Ensure that sure Compatibility level dropdown is set to SQL Server 2005(90).
8. Click OK. Now your database is attached.
9. Now create the sirius user. A security log-in for the sirius user needs to be created.
Note: The siriusweb user needs to be created as well if you implement the E-Commerce or Rentals modules (Rentals module needs this for the self-entry functionality). If this is the case at your site, repeat these directions. Select a strong password for the siriusweb user.
10. Delete the existing sirius user:
1. In SQL Server Management Studio, expand the Databases folder > SiriusSQL folder > Security folder.
2. Go into the Schemas folder and delete the sirius user (only if present, though it probably won’t be).
3. Go into the Users folder and delete sirius user.
11. Create a new sirius and siriusweb user (if these already exist, you need to delete and re-create these users):
1. In the SQL Server Management Studio, expand the Security folder and right-click on Logins, and then select New Login….
Note: If a sirius user already exists, delete it.
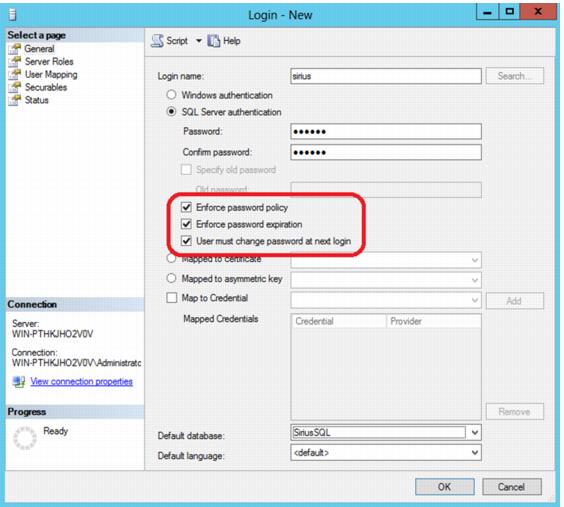
2. On the General page of the Login – New dialog, enter sirius in the Login name: field.
3. Select SQL Server Authentication.
4. Enter sirius in the Password field and confirm it.
5. There are three password control settings (circled in red in the following screen capture) that are checked by default. You must un-check these settings or your Salesware applications won’t be able to connect to the database.
6. Select SiriusSQL as default database.
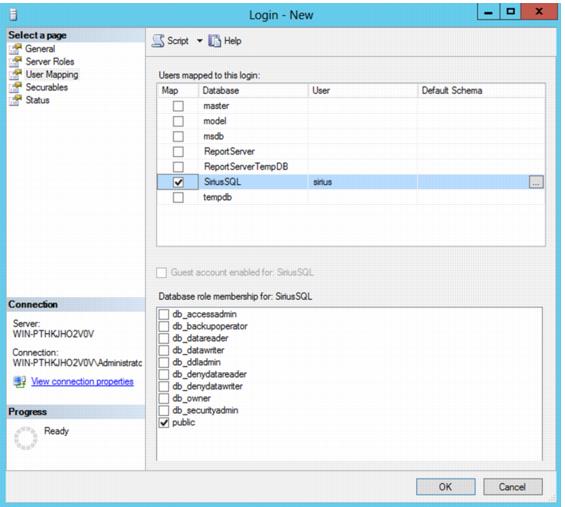
7. Go to the User Mapping page and check the SiriusSQL database. Ensure that the public box also appears as checked under Database role membership for: SiriusSQL.
12. Click OK.
Your database is now ready for use.
Note: It may be necessary for you to run the create_AppRole_SiriusSQL.sql script after attaching the database. If you added the siriusweb user, it is required. This script can safely be run any number of times.