How to create a birthday party reservations system
Note: This can be done using the Salesware Group Scheduling module as well.
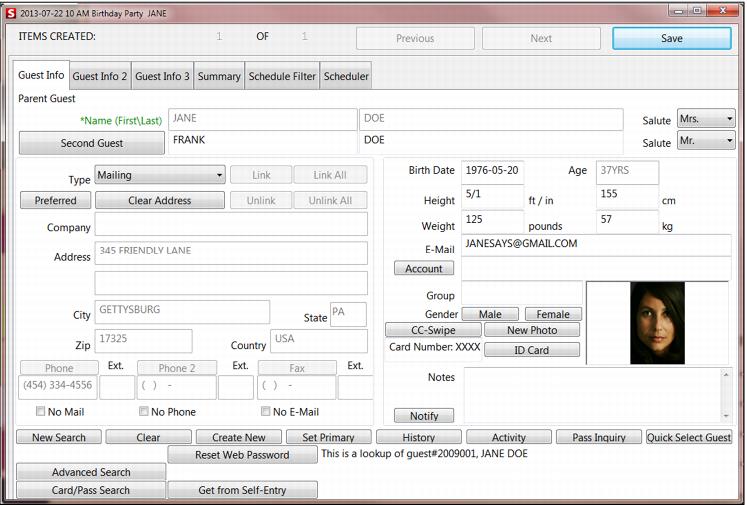
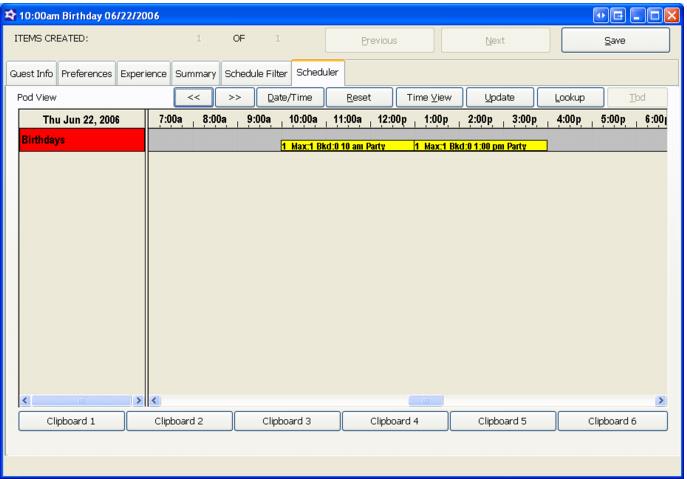
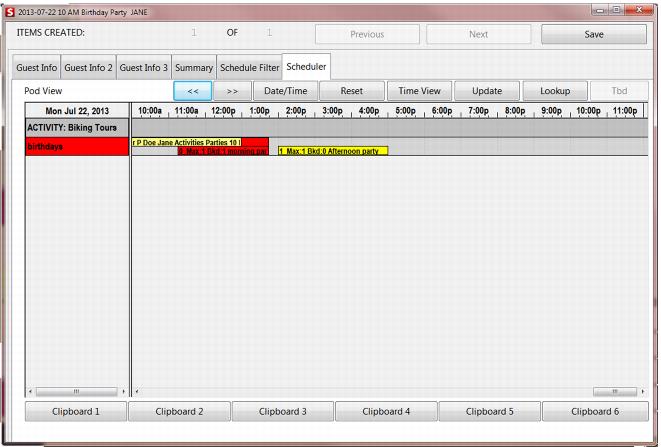
This example implements a birthday party booking system. Customers phone to book on a specific date and provide a $50 credit card deposit; they then pay the balance on the day of the party. When making the booking, you enter guest details and allocate a deposit to the guest, and then set up and block out the date for the party. Parties can be scheduled at 10 AM and 1 PM on any Saturday or Sunday.
The first step is to set up a pod and the product that books into the pod. These instructions go step by step and assume some knowledge about pods in Salesware module. (Pods are documented in detail in the Salesware Activity/Facility Scheduling document.)
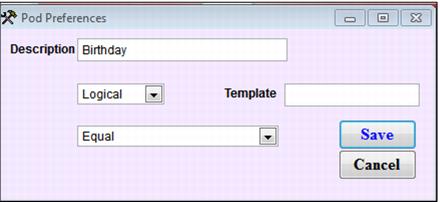
1. Create a pod preference to be used to filter the pods that show up when you are booking the product:
a. Go to SysManager > Activities > Lesson Lists > Pod Preferences.
b. Create a new preference named “Birthday” and set it to Logical and Equal.
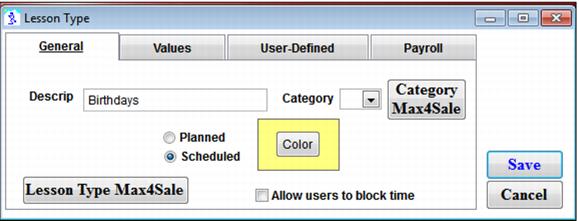
2. Create a type for birthday bookings. The primary purpose of this is to define the color of the birthday booking bar but can be used for other things as well.
a. Go to SysManager > Activities > Lesson Lists > Lesson Types.
b. Create a new Lesson Type. Call it what you like. Set a color for the booking bar and make sure it is scheduled.
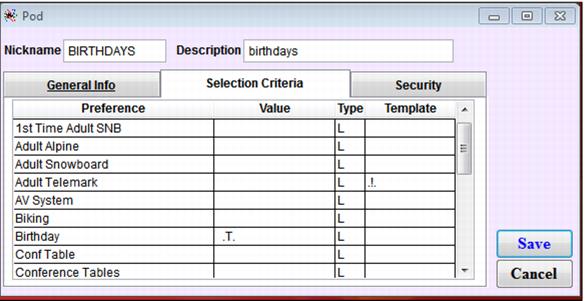
3. Create a birthday pod.
a. Go to SysManager > Activities > Lesson Lists > Pods.
b. Create a new pod. Call it what you like. Under Selection Criteria, make sure to put a .T. in the birthday preference.
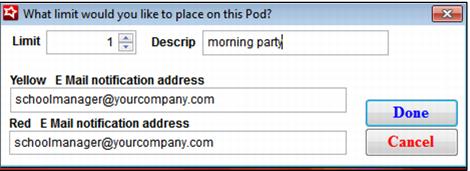
4. Put in the booking limits for the pod.
a. Go to SysManager > Activities > Lesson Activities > Book a Pod – or just click the Pods button.
b. Drag in a limit for the time frames that birthday parties can be booked.
c. You’ll want to drag in limits for each time on each day the birthday parties can happen.
d. You can sort the pods to look at a single pod for a single day of the week (like Saturdays or Sundays) so that you can easily copy the limit down to the other days.
e. But don’t do a big copy until you have tested end-to-end with a single limit for each time.
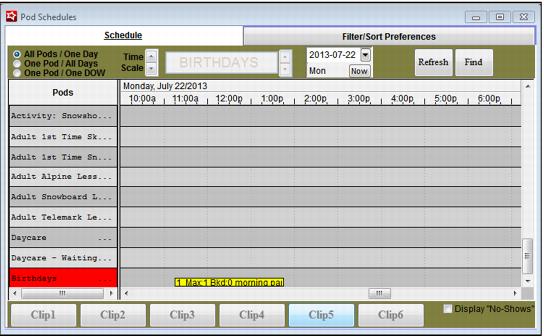
The following screen capture shows dragging in the limit:
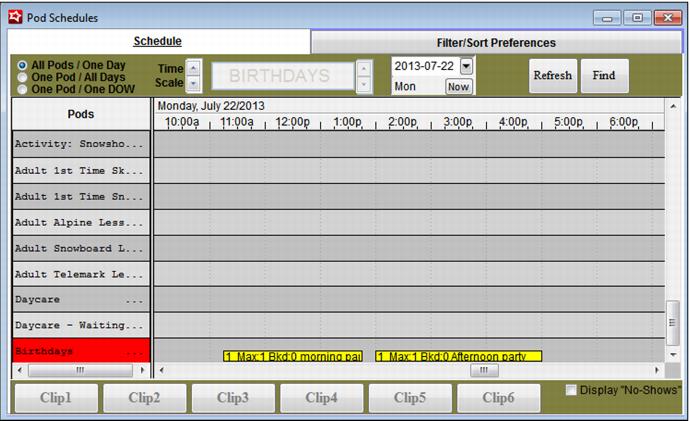
The following screen capture shows the results after you drag in the limit.
The following screen capture shows both limits in place.
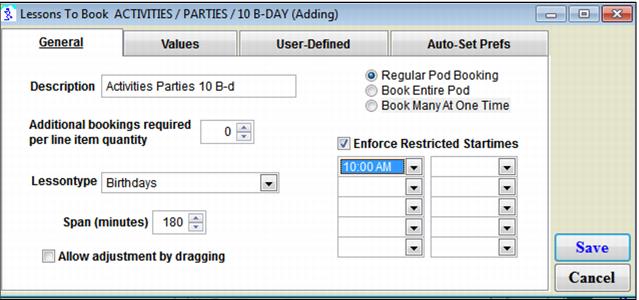
5. Create a product that books into the pod.
a. Go to SysManager > DCIs.
b. Pick a Department and Category to create the item within (or create new ones).
c. Add a new item called “10:00 AM Birthday Party”
d. Fill in all of the normal information like Nickname, Description, Price and Profit Center Split.
e. Click the Action tab and select Begin Pod Booking.
f. Click Action Specifics.
g. Select the Birthdays lesson type.
h. Set the time span to equal the length of the booking bar (180 minutes in this case).
i. Click Enforce Restricted Startimes and set the start time for 10:00 AM.
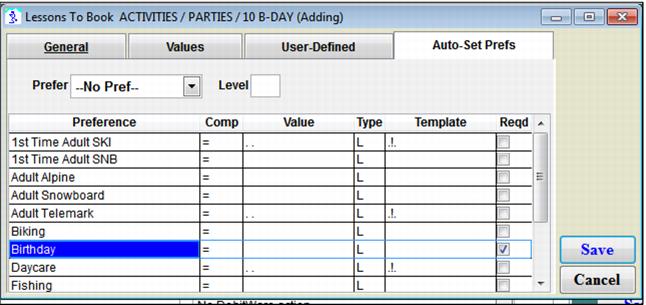
j. Click the Auto-Set Prefs tab and put .T. in for the Birthday preference
k. Make sure to select Reqd.
6. Save the item and add it to your Item Tree. Repeat for the 1:00 PM birthday but make sure to set the required start time to 1:00 PM.
7. Test it by selling and booking a pod in Sales.
a. Sell the item.
b. Set the start date to the day of the birthday.
c. Click Set Guest.
d. Enter the name of the birthday party guest.
e. Go to the scheduler.
f. You see the birthday pod listed and available (colored yellow).
g. Drag in the booking and it snaps to the right time.
Notes:
• If you do this as a part of a reservation with a Reservation Header, you can put the parental information in the Reservation Header and the child’s name in the booking.
• You can save the reservation with a deposit and the booking is saved. Then you can finalize when they show up and take final payment.
• You can run the Pod Booking Report for a list of upcoming birthdays.
• If you use a Reservation Header and set the arrival date, you see all pending birthdays on the Recall dialog.