Detailed steps
1. Click on the Category in which the item is located and click the New button (remember − the DCI is organized based on reporting).
2. Enter a Nickname for the item. The Nickname must be unique within the Category and can be up to ten characters.
3. Enter a Description for the item. This is what the operators see at the Point-of-sale and can be up to twenty-five characters.
4. Enter the appropriate Time Span (used to set the valid date range of the ticket) and Admissions (used in reporting to count the number of entrances sold).
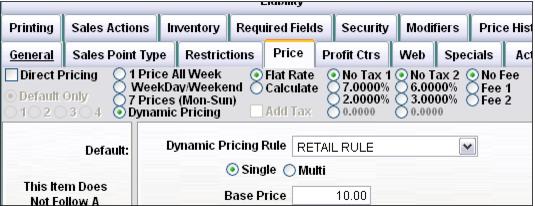
5. Click on the Price tab, select the appropriate pricing method, and enter the price for the item. Select the appropriate tax rate if necessary. Remember to click the Add Tax box if the tax is added to the price of the item (without it checked, the tax is backed-out of the price of the item).
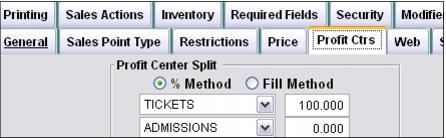
6. Click on the Profit Center tab and select the appropriate Profit Center. Revenue for the item can be split to up to six different profit centers. Using the % Method is recommended.
7. Click on the Specials tab and add any Specials that are allowed to discount the item (that are not already considered “global” specials that can discount any item sold in the system).
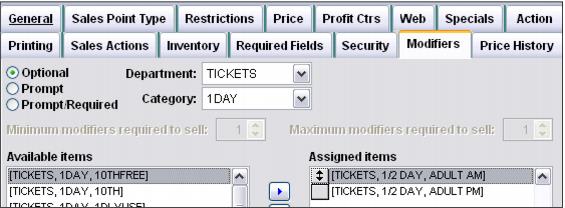
8. Add any modifiers necessary on the Modifiers tab. Remember that you can insert “blank” items (items with no descriptions) in order to create spaces between the Modifier buttons at the point-of-sale.
Note: Modifiers can be used to create package products − for instance, with every adult ticket purchase the guest can receive one child ticket free.
9. Click on the Printing tab and make sure to select the appropriate printing method for Ticket 1, or Ticket 2, or Voucher 1, or Voucher 2 if a ticket prints when the item is sold. In general, try to use the Shared TM Layout. This method allows you to browse to a file in order to use the layout specified in the file. When the shared file is changed, all tickets that use that file are updated/changed.
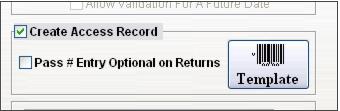
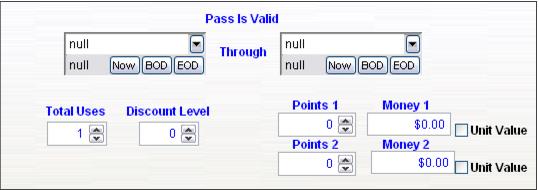
10. Click on the Action tab, check the Create Access Record check box, and click on the Template button.
11. Enter the total number of times that a guest may use this ticket for entrance to the attraction in the total uses field.
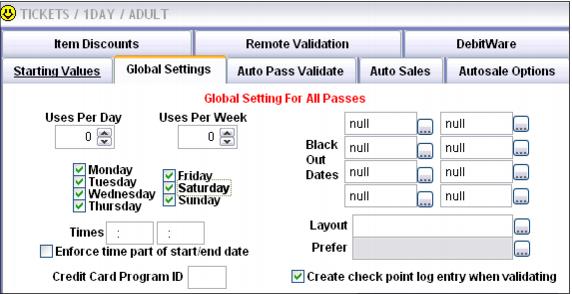
12. If necessary, click on the Global Settings tab in order to enter certain dates when the ticket is not valid for use (for instance, over certain days of the week or holiday periods).
13. Click on the Auto Pass Validate tab and enter the number of total uses that are deducted from the ticket when it is scanned, this is most likely always -1 assuming that you have given the ticket at least one total use on the Starting Values tab. You can also block access to certain locations in order to ensure that specific tickets are only used at certain areas (for example: Aquarium tickets are not scanned at Wildlife World). If you choose to block access based on location, make sure to establish the location numbers that represent each attraction prior to configuring your tickets (or you end up editing all the ticket items later….).
14. If necessary, click on the Auto Sales tab to select the ticket that is auto-sold behind the scenes when the ticket is scanned at the gates (used mostly with consignment and pass programs).
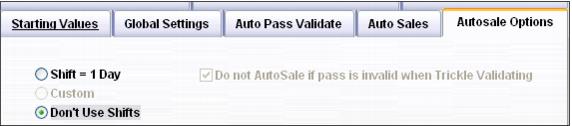
15. Click on the Autosale Options tab and either select Shift = 1 day or Don’t Use Shifts. If the guest may enter the attraction multiple times within the same day, Shift = 1Day is selected. If the guest may only enter 1 time in the day, or for multi-ride products, Don’t Use Shifts is selected.
16. Save your changes.
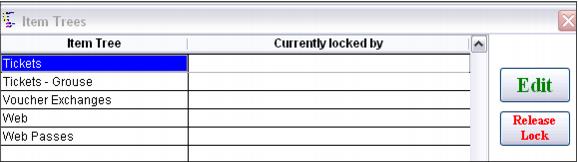
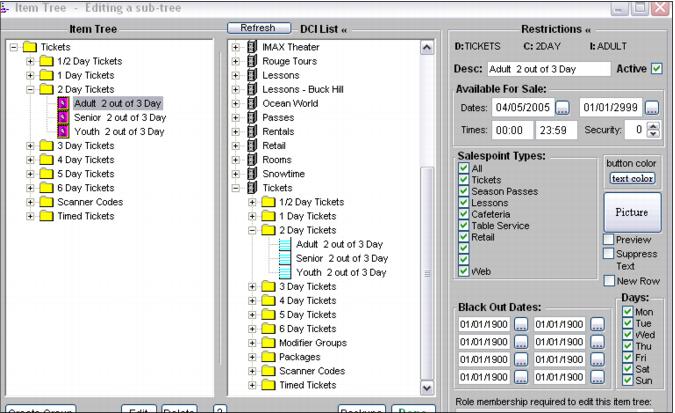
17. Once your ticket items are configured within the DCI list, the next step is to insert them into the appropriate salespoint menu. To do this, click on the Item Tree button in SysManager.
18. Select the appropriate Item Tree (menu used at the salespoints).
19. Expand the DCI tree on the right-hand side and drag the items into the Item Tree. You can arrange the order in which the items appear as well as edit the text and button color. Remember that you can insert “blanks” along with starting new rows in order to customize the look of the menu in Sales. Also, if this item does not appear in the menu in Sales during certain date ranges or days of the week, you can enter these restrictions by selecting the item in the Item Tree side and configuring the appropriate restrictions (shown on the right-hand side of the dialog).