Detailed steps
1. Click on the Category in which the item is located and click the New button (remember -- the DCI is organized based on reporting).
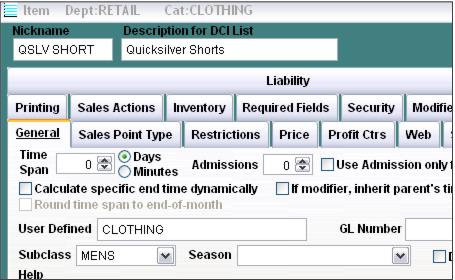
2. Enter a Nickname for the item. The Nickname must be unique within the Category and can be up to ten characters.
3. Enter a Description for the item. This is what the operators see at the Point-of-sale and can be up to twenty-five characters.
4. Select a Subclass and Season if appropriate.
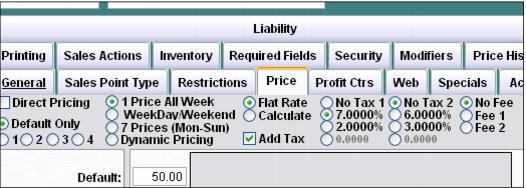
5. Click on the Price tab, select the appropriate pricing method, and enter the Price for the item. Select the appropriate tax rate if necessary. Remember to click the Add Tax box if the tax is added to the Price of the item (without it checked, the tax is backed-out of the Price of the item).
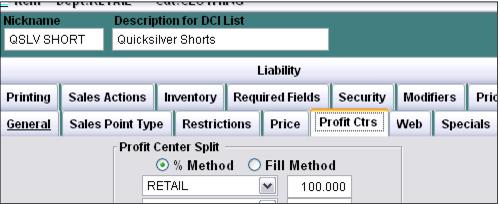
6. Click on the Profit Center tab and select the appropriate Profit Center. Revenue for the item can be split to up to six different profit centers. Using the % Method is recommended.
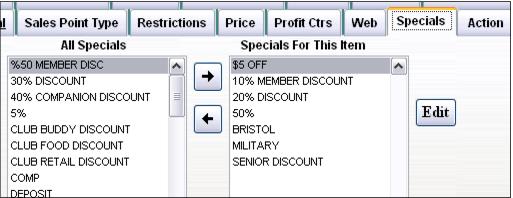
7. Click on the Specials tab and add any specials that are allowed to discount the item (that are not already considered “global” specials that can discount any item sold in the system).
8. Add any Modifiers necessary on the Modifiers tab. Remember that you can insert “blank” items (items with no descriptions) in order to create spaces between the Modifier buttons at the Point-of-sale.
Note: This is a way to package Retail module products together – or even Retail and Ticketing products. For example, with every Shark Dive ticket purchased, you receive a free t-shirt.
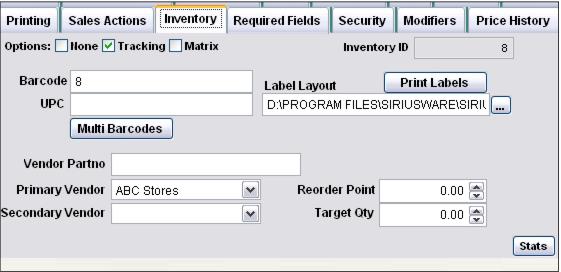
9. Click on the Inventory tab and select either Tracking or Matrix.
10. If configuring a Tracking item, enter the appropriate information in the field that is used to identify the item when its barcode is scanned. Enter the path to the Label layout used by the item. A Primary and Secondary Vendor can be selected for the item and Re-order and Target levels may also be configured.
11. If configuring a Matrix item, select the appropriate Matrix template and click on the Maintenance button to enter the appropriate information (numbers from the UPC or other retail barcode labels used, vendors, order levels, etc.) An easy way to enter barcode numbers for the Matrix item is to scan the actual retail barcodes into the corresponding cells after selecting the appropriate value from the dropdown box. In the example below, UPC is selected, so the numbers scanned into the various cells is stored in the UPC field for the item and each UPC code represents the various color and size combinations of the retail item. Make sure that the scanner that you use for this task is not configured with the %R prefix that is necessary for the salespoint scanner functions. Make sure to also select the appropriate Retail Label Layout for the item.
12. You do not need to add retail items to the item tree as the items are added to a sale by scanning a barcode or doing an inventory lookup in Sales. You can create a menu of items for operators by using the item tree, but it is not mandatory.