Detailed steps
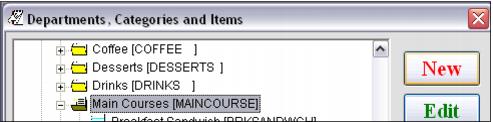
1. Click on the Category in which the item is located and click the New button (remember − the DCI is organized based on reporting).
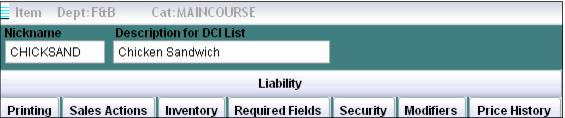
2. Enter a Nickname for the item. The Nickname must be unique within the Category and can be up to ten characters.
3. Enter a Description for the item. This is what the operators see at the Point-of-sale and can be up to twenty-five characters.
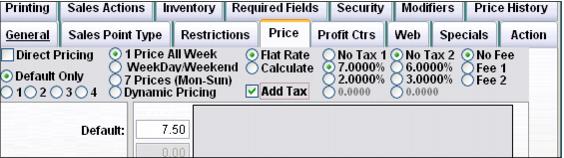
4. Click on the Price tab, select the appropriate pricing method, and enter the Price for the item. Select the appropriate tax rate if necessary. Remember to click the Add Tax check box if the tax is added to the Price of the item (without it checked, the tax is backed-out of the price of the item).
5. Click on the Profit Center tab and select the appropriate Profit Center. Revenue for the item can be split to up to six different profit centers. Using the % Method is recommended.
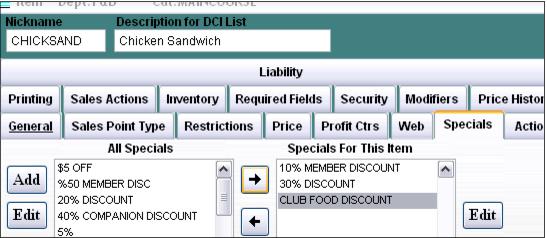
6. Click on the Specials tab and add any Specials that are allowed to discount the item (that are not already considered “global” specials that can discount any item sold in the system).
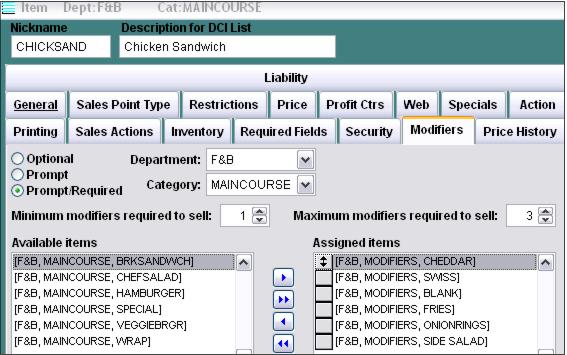
7. Add any Modifiers necessary on the Modifiers tab. Remember that you can insert “blank” items (items with no descriptions) in order to create spaces between the Modifier buttons at the Point-of-sale.
Note: Modifiers are most commonly used in Table Service environments and not used as much in Quick Service environments.
8. Save your changes.
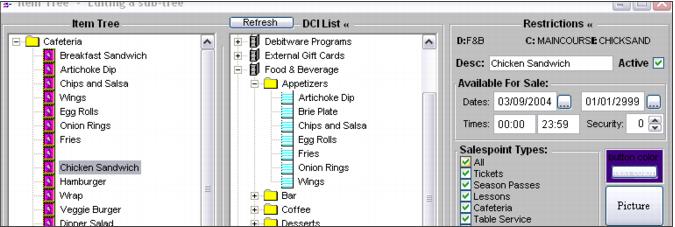
9. Once your Food Service module items are configured within the DCI list, the next step is to insert them into the appropriate salespoint menu. To do this, click on the Item Tree button in SysManager.
10. Select the appropriate Item Tree (menu used at the salespoints).
11. Expand the DCI tree on the right-hand side and drag the items into the Item Tree. You can arrange the order in which the items appear as well as edit the text and button color. Remember that you can insert “blanks” along with starting new rows in order to customize the look of the menu in Sales.