Configuration
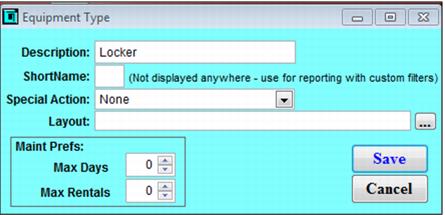
1. Create the necessary Equipment Types and Equipment Levels. (SysManager > Activities > Rental Lists). Typically the Equipment Type describes the object being rented (Locker) and the Equipment Level is generic (N/A).
Note: Clients may have more types of rental items, for example different locker sizes, wheel chairs, scooters, etc. The levels won’t be used in the rules, but it is good practice to separate the inventory if you truly have three levels of lockers, for example. In this case, you can create more types and levels as follows:
Example of Types and Levels:
Type | Level |
Locker | Small |
Locker | Medium |
Locker | Large |
Stroller | Single |
Stroller | Double |
Note: These types and levels will ONLY be attached to the inventory.
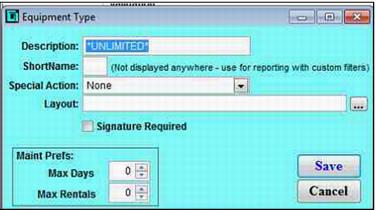
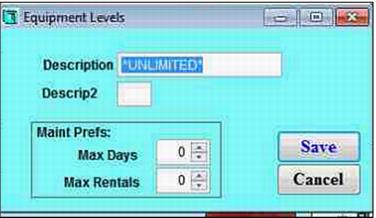
2. Create an *UNLIMITED* type and level.
Note: This must be in caps with asterisk exactly as shown!
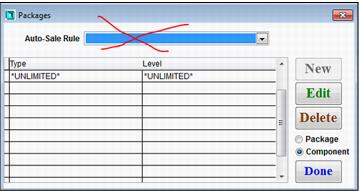
3. Configure the Rental Component items. The Rental Component configuration is used to pair the various Equipment Type and Level combinations. This component item will be used with all of the rental items in the following steps:
• Create an item called, “UNLIMITED”
• Action: Set to Begin Rental item
• Action Specifics: Choose the Component radio button and click New. Then, select the *UNLIMITED* type and *UNLIMITED* level, and then Save.
Note: Do not set any rules in the component.
4. Configure the rental items that are sold to customers. For businesses that rent lockers and return key deposits, this would be similar to the following:
• Daily Locker Rental
• Locker Deposit Return
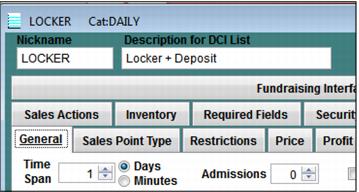
5. For the Locker Rental item, make sure the following is completed
• Configure the rental items with the appropriate Time Span, as this value will be used to calculate the due date. Typically this is set to 1.
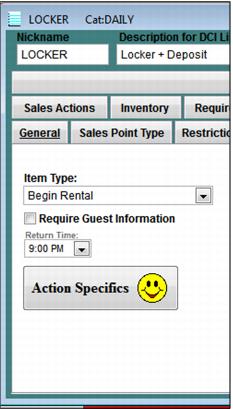
• Action tab: Select Begin Rental, set a Return Time and uncheck Require Guest Information for the rental items.
• Action Specifics: Select the Package radio button, click on new and then choose the *UNLIMITED* *UNLIMITED* component from the drop down list.
• Ensure nothing is checked in the Required Fields tab.
• Set price of the rental and select the appropriate Profit Center.
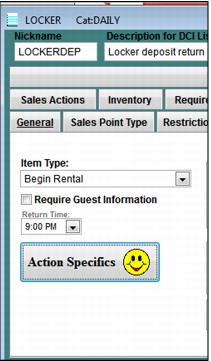
6. For the Deposit Return items:
• Action tab: Select Begin Rental and uncheck Require Guest Information for the rental items
• Sales Action: SELECTLAST()QUANTITY(-1)
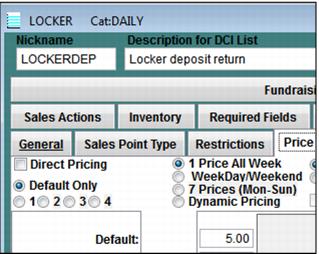
• Price tab, set the dollar amount of the deposit
• Optionally, you can use modifiers for deposits if you want to take cash or credit card deposit.
• Set the Profit Center for the deposit amount
7. Configure the Rental Auto-Sale Rules (SysManager > Activities > Rental Lists > Rental Auto-Sale Rules). These rules are used to analyze the status/type/level of the equipment in order to perform various actions in Sales, such as the auto-sale of an item or customized message/display to the operator.
Example:
If the inventory is a Locker item and the status is Out, the auto-sale is a Locker Deposit with a customized display including the date due, rental duration and message entered during the initial Daily Locker rental sale.
Rule Steps that you will need to complete:
a. Create a new rule for each type of rental item that was created previously.
• For example, if you have a small, medium and large locker, you would have three rules.
b. Paste the example rule into the rules created above and change the DCIs in order to SELECT the correct rental and return items
Note: The rules will be attached to the Inventory items ONLY.