Group leader log-in
A visitor/guest that is eligible to log-into the special “group” or “club” area as a group leader needs access to the link to the group log-in page and the appropriate log-in name (account Nickname) and password (contents of the Group Leader Password field).
In this example, the link provided to the guest is to the grpLogin.aspx page. With Site Admin Panel > Group/Accounts and Club Management Settings > UseClubLogin value = 1 in the Site Configuration, the guest is redirected to the grpLogin2.aspx page.
The log-in provided is: tbeachclub.
The password proved is: surfsup.
The log-in page looks identical to the log-in page for group members.
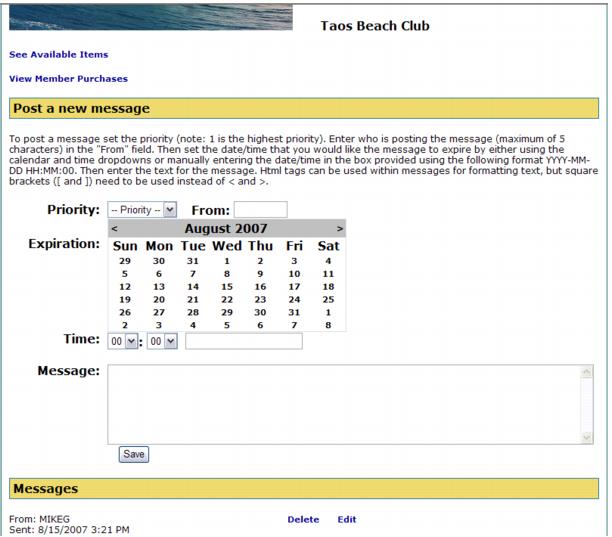
Once logged in successfully, the group leader is taken to the main club page where he sees the same things that the group members see. In addition, however, they see a link to take them to the report for viewing member purchases, an area for posting new messages and in the area for reading messages they see links for deleting and editing messages.
A group leader can post a new message to the group following these steps:
1. Set the priority (1 is the highest priority).
2. Enter who is posting the message (maximum of five characters) in the From field.
3. Set the date/time that you would like the message to expire by either using the calendar and time dropdowns or manually entering the date/time in the box provided using the following format: YYYY-MM-DD HH:MM:00.
4. Enter the text for the message in the Message field.
Note: HTML tags can be used within messages for formatting text, but square brackets ([ and ]) need to be used instead of < and >. So, for example, to insert a line break one would use [br] or to make the word Welcome appear in bold font one would enter [b]Welcome[/b].
Note: The
Priority and
Time dropdown values can be customized. Please see the
Customizing Message Priorities and Time values for Group Leader Messages.
5. Click the Save button to post the message.
To edit an existing message, the group leader needs to follow these steps:
1. Locate the message from the list of posted messages that you want to edit and click the Edit link for that message.
2. The fields in the Post a new message section of the page is populated with the information from the message.
3. Edit the Message fields as appropriate.
4. Click the Save button to update the message.
A group leader can delete an existing message by following these steps:
1. Locate the message from the list of posted messages that you want to delete and click the Delete link for that message.
2. The message is deleted immediately.
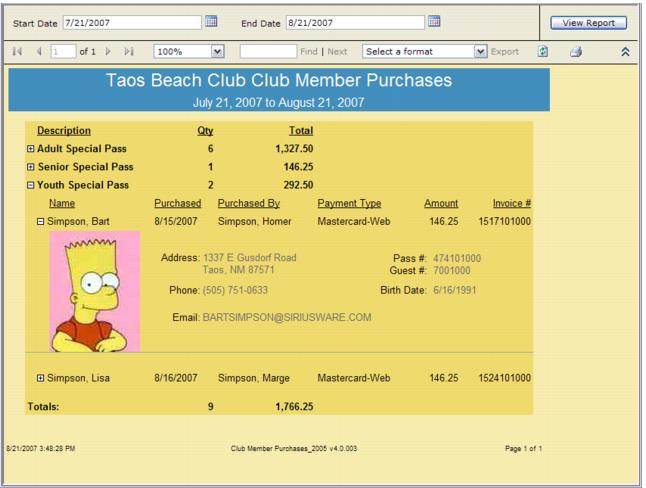
Clicking on the See Available Items link takes the group leader to the ItemList.aspx page where the contents of the WEB TBEACHCLUB item tree are displayed in the same manner as for group members. Clicking on the View Member Purchases link opens a new browser window where the Member Purchases Report is displayed:
The report lists each of the items purchased that have guests attached to them, the quantities purchased and the total sales. Clicking on the + sign next to an item expands that section and displays the name of the guest that is attached to the item, the date purchased, who purchased the item, how the item was paid for, the amount paid, and the invoice number. Clicking on the + sign next to the guest name expands that section and displays address, phone number, e-mail address, pass number, guest number, birth date and a photo of the guest attached to the item.