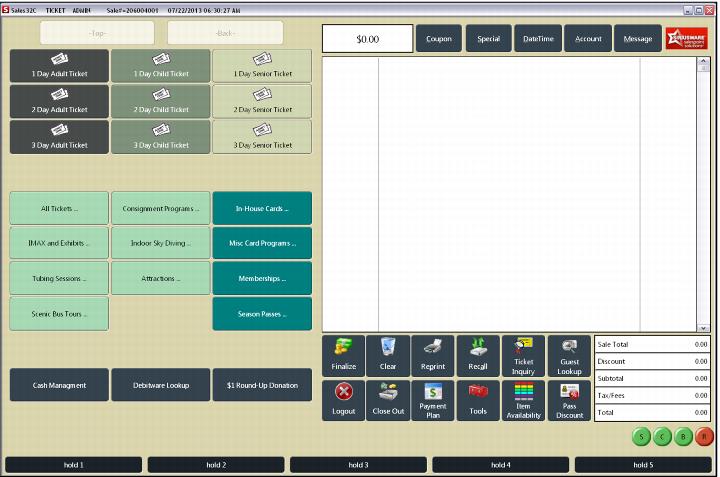
The Sales component of Salesware is used by operators to sell tickets, passes and other products. The main Sales interface is shown in the following screen capture:
On the left side of the screen is the menu of products you can sell, also referred to as the menu of “items.” You can configure simple or elaborate hierarchies of items and navigate the hierarchies using the two large buttons on the screen above the items. On the right side of the screen is the area where items are added to the sale. The two rows of buttons along the bottom right of the screen enable you to finalize sales, save sales, look up guests, and so on. These are called the
Main Action buttons. If you are using the Reservations module, you use the large
Create New Reservation Header button above the “invoice” (area where items are added to the sale) to make reservations. The
hold buttons along the bottom of the screen allow the operator to hold a sale at the POS for a short period of time. The round, colored buttons on the lower far-right of the screen, sometimes called the “M&M” buttons, show whether the salespoint is connected to the Middleware, credit cards and PrintEZ application (see
How to determine connection status and verbosity). You can manually connect and disconnect from the Middleware using these buttons. (Middleware is described in the
Salesware Installation Guide and
Salesware System Architecture and Specifications documents. A salespoint “talks” to your central database via middleware, but a salespoint can operate successfully even if it loses its connection to the middleware.)